Whether you’re hosting a Halloween bash or just planning to pass out treats, these last-minute Halloween recipes from TheFitFork.com are killer. Plus, they aren’t packed with sugar – in fact, you can flex your monster muscles even more because they are all a good source of protein thanks to ingredients like nuts, cottage cheese or protein powder. From spooky snacks to hearty mains, these tasty, fit Halloween party food recipes will sustain your energy through all the frightful festivities!
Turmeric Deviled Eggs that Look Like Pumpkins: So cute and clever, this protein-packed snack could bring a smile and new life to even the most dead of zombies. High-five for Halloween protein!
Hot Honey Snack Mix: This spicy-salty-sweet snack mix will be a hit with all the monsters who love to munch! You can sub in gluten-free pretzels and crackers, depending on your needs. It disappears quick, I’d make double batch for Halloween party food!
Beef Bone Broth Chili: Warm up your bones with this hearty beef chili that is PACKED with protein thanks to lean ground beef, beef bone broth and kidney beans.
Pumpkin Protein Peanut-Butter Cups: Put a seasonal, sugar-free spin on one of America’s favorite candies, with this easy-peasy recipe that celebrates pumpkin spice – the macros are so nice in this sugar-free Reese’s Cup makeover.
Garlic Roasted Pumpkin Seeds: Easy and economical – I mean, why throw the guts of your Jack o’ Lantern away! Make this tasty, addictive snack in the air-fryer or oven and use garlic salt – or the other seasonings of your choice!
Pumpkin Protein Snicker Doodle Cookies: Capture all the vibes of the fall with these simple snickerdoodle cookies rolled in cinnamon-sugar and baked with buttery-crisp edges and a soft, chewy center. Protein powder – choose your favorite variety – pumps them up with protein.
Low Carb Pumpkin Spice Latte Cookies: No protein powder in this sugar-free, gluten-free pumpkin protein cookie, but still boasts about 5.5g protein per pieces. Ahh, and that pumpkin spice latte drizzle is everything!
Gingerbread Chai Oat Milk Latte with Collagen is the perfect hot beverage to add spice and coziness to the holidays.
‘Tis definitely the season for comforting, hot lattes, cappuccinos, lattes and more, but so many coffee-shop favorites make the naughty list, filled with unnecessary calories and sugar. While I might partake in such an indulgence every now and then, a healthy chai latte or is what I’d make to drink at home.
This makeover chai latte recipe is easy to make, requiring just a few simple ingredients – a chai tea bag, a zero-carb sweetener, spices, oatmilk, and – surprise, collagen powder.
I use a couple tablespoons of unflavored collagen powder from Great Lakes Wellness –it dissolves amazingly and with no clumps in hot liquids. In addition to the many benefits of collagen, I love that it adds protein to my day.
A “Grande” (16-oz) serving of my healthy gingerbread chai latte has just 153 calories, only 4g sugars and 14g protein – while the popular coffee shop version has 310 calories and a whopping 54g sugar and only 2g protein per.
TIPS FOR MAKING GINGERBREAD CHAI OATMILK LATTE
Mug: Make sure you mug is large enough to hold all the liquids – air in the frothed almond milk gives it more volume, so to be safe and prevent overflows, I’d go with a 20-ounce mug.
Tea: Brew the chai tea of your choice, there are many varieties with varying flavor profiles, use your favorite loose or tea sachet. I used a Vanilla Chai tea bag from Aplenty (an Amazon brand, it tasted great and was priced very economically). Also, steep the tea in just 4 ounces of boiling water, no more. It should be concentrated so that it flows into the steamed and frothed milk.
Milk: While this particular healthy chai latte recipe calls for oat milk, it’s fine to swap out for what you have in the fridge or what works best for your dietary needs. When it comes to alternative milks, I feel like oat milk froths up thicker and creamier than almond milk – I use the Barista Blend by Good Karma , it’s also shelf stable, so I can always have a new carton waiting in my pantry.
To Froth or Not: A true latte has a shot of espresso (I’m using chai tea here), a layer of steamed milk, and a layer of frothed milk. Do this if you want to make a chai latte like Starbucks. I use Pitcher-style Milk Frother & Steamer, but a little hand-held frother works too. However, if you do not have these coffee tools available, simply heat milk in the microwave until hot – the latte won’t have froth on top, but will still taste amazing.
Sweetener: I avoid having added sugar in my beverages, whether hot or cold. Obviously, real milk has some sugar in the form of lactose and oat milk has maltose – I’m okay with that. What I don’t want is added sugar to make it taste sweet. Instead, I’ll use a zero or lower carb alternative like monk fruit or stevia. Better Stevia (liquid drops) from NOW is my favorite hot beverage sweetener, they even have a “chai” flavor which is what I used in lieu of additional spices. Honey, agave or maple syrup would work too, but will change the nutritional content. When it comes to sweeteners, I’m always like, “You do you!”
As an Amazon Influencer, I earn from qualifying purchases.
Gingerbread Chai Oatmilk Latte withCollagen – my better-for-you version of a coffee shop favorite. Easy to make, no added sugar, and a boost of protein plus other benefits. So cozy and sweet andspicy, happy holidays!
5-10chia-spice liquid stevia drops or other sweetener option*if not using chia-spiced sweetener, add ground spice alternative (1/4 tsp each: ginger, cinnamon, nutmeg)
2tbspcollagen powder
8ozunsweetened Oat Milk
Pinchground cinnamon for garnish
Instructions
Boil water and steep chai tea for 3 minutes. Stir in collagen powder until dissolved.
Add chai-spiced stevia.* If using an unflavored stevia or other sweetener, add in approx1/4 tsp each ground ginger, ground cinnamon, ground nutmeg to taste.
Heat/steam half of the oat milk and stir into chai.
Froth remaining oat milk and gently pour on top of chai-milk mixture.
Deck your plate for the holidays with this festive quinoa salad featuring pomegranate and orange. it’s a beautiful, healthy, delicious recipe elegant enough for the season’s celebrations and simple enough for a simple weeknight dinner.
A simple creamy dressing made with a vinaigrette base along with Greek yogurt and date syrup adds even more flavor to this simple holiday quinoa salad that comes together with just a handful of healthy ingredients.
This pomegranate orange quinoa recipes makes 4 servings, each with 146 calories, 26g carbs, 3.1g fat and 4.8g protein.
I pair this cold quinoa salad with a quality protein to make sure I’m hitting my 25-30g per meal goal. Tonight, I made cod that was simply seasoned and air-fried.
TIPS FOR FESTIVE QUINOA SALAD:
Quinoa: You can use any color quinoa (eg: white, red, black, mixed). Also, consider batch-cooking quinoa and keeping in the freezer in 1-cup portions. This makes creating quick recipes with this healthy whole grain (really a seed), even easier – you can read my quinoa prep post HERE.
Pomegranate & Oranges: Use fresh or pre-packaged, it really only comes down to your preference and time to prep. If using either from a jar, tub, or can, choose “no sugar added” and drain off the juice so the quinoa isn’t soggy later. However, do reserve about 1 tablespoon of pomegranate juice for the dressing (or if fresh, drain it from the bowl after getting the arils out).
Dressing: This recipe makes just enough for the salad, and I prefer underdressed salads. If you think it needs more, double the dressing recipe and pour it on a little at a time – going by taste. Also, if you’d like to turn this from a vegetarian quinoa recipe into a vegan quinoa recipe, then use a substitute for the Greek yogurt, such as a plant-based yogurt, tahini or a natural nut butter.
Optional Ideas: You can swap out the pistachios for a chopped nut of choice like almonds, pecans – or none at all. Also, I love to sprinkle mine with feta cheese for a salty contrast with the sweet.
Make Ahead & Storing: This recipe will get a little soggy if you make the day before. To save time, it’s best to prep the ingredients (cook quinoa, chop spinach, peel/seed fruit, etc) the day before. Then simply toss everything together and shake up the dressing – it will literally just take 2 minutes! You can store leftovers in the fridge for up to 3 days. Still tastes yummy, but the crunch of the nuts and crisp of the spinach will be gone.
This is one of my favorite creative quinoa salad ideas – for it’s flavor, fast-fixing, and festive appearance! Enjoy!
As an Amazon Influencer, I earn from qualifying purchases.
Transform plain quinoa into something to celebrate for theholiday season! Pomegranate, orange segments and pistachios bejewel this quick,easy and nourishing vegetarian salad that is equally beautiful for a dinnerparty or quick lunch!
Course:
entree salad, Side Dish
Cuisine:
holiday
Keyword:
holiday, orange, pomegranate, quinoa
Servings: 4servings
Calories: 162kcal
Ingredients
1cupcooked quinoa
1cupchopped fresh baby spinach
¾cuppomegranate arilsjuice drained & reserved if packaged container
¾cupmandarin orange segments packed in water or juiceor fresh
¼cupshelled pistachio kernelscoarsely chopped
Dressing:
1tablespoonolive oil
1tablespoonjuice reserved from pomegranate or orange segments
1tablespoonwhite wine vinegar
2tablespoonsGreek yogurt
1tablespoondate syrup
1/8teaspoonsalt
Instructions
Add quinoa, spinach, pomegranate and orange segments (cut in half crosswise) into medium bowl.
In small mason jar, shake together dressing ingredients until emulsified.
Pour dressing over salad and gently stir.
Before serving, stir in pistachios.
Best eaten right after making to keep the texture of the lettuce and pistachios. But you can store leftovers in fridge for up to 3 days and it’s still good.
Life has been busy, and I’m a little late on sharing my recipe for Garlic Pumpkin Seeds in Air Fryer (or Oven). Halloween has come and gone, and you’ve probably already carved a pumpkin which is the perfect time to roast pumpkin seeds)!
BUT, if you still have a whole pumpkin sitting around or are getting one to process the flesh for Thanksgiving recipes, remember to SAVE THE SEEDS! You can keep the white pumpkin seeds raw in the fridge (in an air tight container) for a few days, if you don’t have a few minutes to spare to roast up in the air-fryer.
Roasted garlicky pumpkin seeds are a smart and healthy snack . .. and economical too if you already have the pumpkin on hand! You can basically make roasted pumpkin seeds for “free” . . . while they are big bucks in the bulk bin at the grocery store ($10.48/lb at my market).
A question I hear frequently – CAN I EAT THE WHITE OUTER SHELL? Yes, yes you can -it’s loaded with fiber and satisfyingly crunch after roasting. The shell and kernel are also a good source of minerals like iron and magnesium. The actual seed kernel is inside the white outer shell, you may recognize them as the little green pepitas that are so popular right now.
Making DIY roasted pumpkin seeds in the air fryer is so simple the kids can do it. Just pull out the seeds from the center of the pumpkin and as best you can, extract from the pulpy strands attached. Throw the seeds in a bowl to wash off the remainder of pumpkin pulp and then spread out on a paper towel to dry for 30 minutes or so. Then, for every on cup of pumpkin seeds in their shells, it’s just a matter mixing them up with 2 tsp olive oil and ½ tsp garlic salt (plus a pinch of chili pepper if you’d like), before spreading in a thin layer and air frying (in UNpreheated air fryer) at 360F for 12 minutes, shaking pan halfway through. You can roast in the traditional oven PREheated to 360, for about 12 – 14 total minutes.
This is not a sponsored post, but I feel compelled to tell you about the very best air fryer I’ve used. It’s the Omni Plus 19L/18Q Multi-Function Air-Fryer and honestly love it more than any appliance in my kitchen – we use this mini oven style air fryer numerous times a day. I can’t imagine life without it, lol.
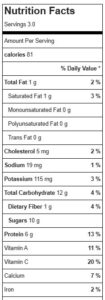
I like to eat roasted pumpkin seeds them as-is, or toss in a trail mix or on my salad. If you don’t care for garlic roasted pumpkin seeds, just use regular salt. A ¼ cup serving has 81 calories, 8.5g carb, 4.2g fat and 3g protein.
As an Amazon Influencer, I earn from qualifying purchases.
Garlicky Roasted Pumpkin Seeds can be made in the air-fryeror oven and are a quick, easy and economical snack you and your family willlove this fall season.
Course:
Snack
Keyword:
air fryer, chia seeds, garlic, pumpkin seeds
Servings: 4servings
Calories: 81kcal
Ingredients
1cupraw pumpkin seeds in white shell
2 tspolive oil
1/2tspgarlic saltor seasoned salt
Instructions
Rise pumpkin seeds to remove pulp.
Pour out onto a clean dish cloth or paper towels at pat dry – let air dry for another 15-30 minutes.
Add seeds to bowl and stir in olive and garlic salt or seasoned salt.
Add to air-fryer (not preheated) set to 360 and "roast" for 12 minutes, shaking pan at the halfway point.
To make in oven, PREHEAT oven to 360 and roast for about 12 to 14 minutes.
Enjoy! Store cooled leftovers in an air-tight container.
Gouda Mac and Cheese with Brussels Sprouts and Mushrooms offers a tasty and on-trend twist to one of America’s most comforting pasta dishes. The rich, earthy flavors of Brussels sprouts and mushrooms seemingly melt into the creamy goodness of Gouda cheese – combine all that with the pasta of your choice, and it’s noodle nirvana!
Plus, veggies – don’t forget you sneaked vegetables into each and every serving of this gouda mac and cheese! It’s a great way to convince kids to eat more of the good stuff. As for the pasta, you can use the flour variety (eg: traditional durum wheat or a gluten-free alternative (I like ZenB Pasta made from 100% yellow peas to offer LOTS of fiber and protein)
This Brussels sprout mac and cheese is an easy 9” x 13” side dish and makes a great take-along offering to a pot luck or holiday feast at a friend’s house – keep it warm in this awesome casserole cozy. I know It will be one of our most popular and best thanksgiving side dishes of this year.
TIPS FOR GOUDA MAC & CHEESE WITH BRUSSELS SPROUTS
Cheese Swap: You can swap out the Gouda for an equal amount of sharp cheddar (or really any similar cheese) for a bold change.
Don’t Like Mushrooms?: Just leave them out, no other modification needed.
Don’t Like Brussels Sprouts?: Swap with fresh broccoli florets and roast as directed for Brussel sprouts in recipe.
Pasta Shape: I prefer an elbow macaroni, penne, cavatappi or rotini for Mac and Cheese recipes. These have lots of twists and/or tunnels to catch the cheesy sauce.
Pasta Alternatives: I’ve used both traditional and gluten-free pastas to make this Brussel Sprouts Mac & Cheese, so go with your preference. It’s best when pre-cooking the noodles to take them off al dente (very slightly “to the tooth” or firm) because they will cook a second time as a mac and cheese casserole in the oven.
Note: As an Amazon Influencer, I earn from qualifying purchases.
This delicious, hearty mac and cheese can be made ahead and baked as a side dish for Thanksgiving or other family meals! It's a 9×13 casserole crowd pleaser!
Course:
Pasta, Side Dish
Keyword:
9×13, brussels sprouts, comfort food, mac and cheese, pasta
Servings: 8servings
Ingredients
8ouncesbrussels sprouts; tough outer leaves removedtrimmed and halved (or quartered, if large)
8ounceswhite button mushroomsquartered
2tbspolive oildivided
½tspsaltplus a dash more for pasta water
½teaspoonground black pepper
1 8-ouncebox of uncooked pastaelbows, rotini, penne or similar
6ouncesgouda cheesegrated
¼cupbutter
¼cupflour
2tspDijon mustard
1tspminced garlic
1/2tsppaprika
18ounceswhole milk
1ouncefresh-grated Parmesan cheeseabout ½ cup
Instructions
Pre-heat oven to 425F.
Trim Brussels sprouts and pull off tough outer leaves. Half smaller sprouts, and quarter large ones. Do the same for mushrooms.
In 9” x 13” glass baking dish, add Brussels sprouts. Drizzle with 1 tbsp of olive oil, and sprinkle with about half of the salt and pepper to season.
Roast in oven for a total of 20-25 minutes. After 10 minutes, pull out and add mushrooms to the dish, along with the remaining olive oil, salt and pepper. Return to oven to roast for 10 more minutes (so 10 minutes total for mushrooms, 20-ish for sprouts).
While vegetables are roasting, bring water to boil in pasta pot and prepare pasta per package instructions for “al dente”. After cooking, drain in colander and set aside.
In same pot that pasta was cooked in (now empty), melt butter over medium-high heat. Sir in mustard and garlic and stir for about 1 minute. Next add in flour a little at a time, using a whisk to incorporate. Whisk constantly, making a roux that turns deep golden brown, in about 3 to 4 minutes.
With heat turned to medium, pour in milk a little at a time, whisking until combined and smooth. Next add cheese a little at a time, whisking until smooth.
Add cooked pasta to cheese sauce and mix until coated. Then pour into 9×13” dish with roasted veggies; stir. Top with 1 ounce of fresh grated Parmesan cheese.
Place in oven now heated to 350F. Bake for 15 minutes, or until cheese bubbling and lightly browning on top.