Looking for an easy, delicious way to enjoy mushrooms? These Air Fryer Parmesan Mushrooms are packed with earthy, umami-rich flavor and take just 10 minutes start to finish. All you need to do is slice up white mushrooms, toss them with olive oil, seasonings, and a touch of freshly grated Parmesan cheese—then let the air fryer do its magic.

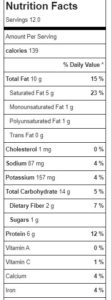
This simple method creates perfectly tender, golden mushrooms that are savory and satisfying. Each serving (the recipe makes two) clocks in at just 100 calories, with 3.5g net carbs, 6.8g fat, and 6.1g protein—making this a low-carb, high-flavor option you’ll want to put on repeat.
Not only do these mushrooms make a fantastic side dish or snack, but they’re also perfect for topping burgers, pizzas, salads, or tossing into pasta for a flavor boost without the fuss.
Pro Tips for the Best Air Fryer Mushrooms:

- Mushroom Variety – White mushrooms (aka button mushrooms) are easy to find and affordable, but you can also use baby bella (cremini) mushrooms for a deeper flavor.
- Oil Options – Use a high-quality extra virgin olive oil for richness, or swap in coconut or avocado oil. For a more indulgent twist, melted butter works too.
- Cheese Matters – Freshly grated Parmesan delivers the most flavor (I love my micro planer / grater tool for this), but if you’re in a pinch, the classic green bottle of grated parm will do.
- Seasoning Ideas – Keep it simple with garlic powder, salt, pepper, and a splash of soy sauce—or get creative with truffle salt, chili flakes, Italian herbs, or a dash of red wine for added depth.
Once you try these air fryer mushrooms, you’ll want to keep a batch on hand all week long. Batch serves two, making it perfectly sized for a smaller “drawer style” air fryer – but I often use my oven-style air fyer and make a double batch. Quick, crave-worthy, and incredibly versatile!

Note: This post contains affiliate links, I may earn a small commission based on purchases. Proceeds help offset operating expenses for The Fit Fork – thanks!
These easy Air Fryer Parmesan Mushrooms are ready in 10minutes or less! A healthy, low-carb snack or side dish with bold umami flavor—perfect on their own or added to burgers, pizza, or pasta.
- 8 ox white button mushrooms, cleaned and sliced can sub Baby Bella
- 2 tsp olive oil
- 2 tsp soy sauce
- 1/4 tsp salt
- 1/4 tsp ground black pepper
- 1/2 tsp garlic powder
- 2 Tbsp fresh grated Parmesan cheese
-
Pre heat air fryer to 380
-
Add sliced mushrooms to medium bowl and drizzle with oil and soy sauce; toss to combine.
-
Sprinkle with salt, pepper and garlic powder and cheese; toss to coat.
-
Arrange in single layer in basket or tray of air fyer. Cook for 6-8 minutes or until mushrooms are soft and tender.