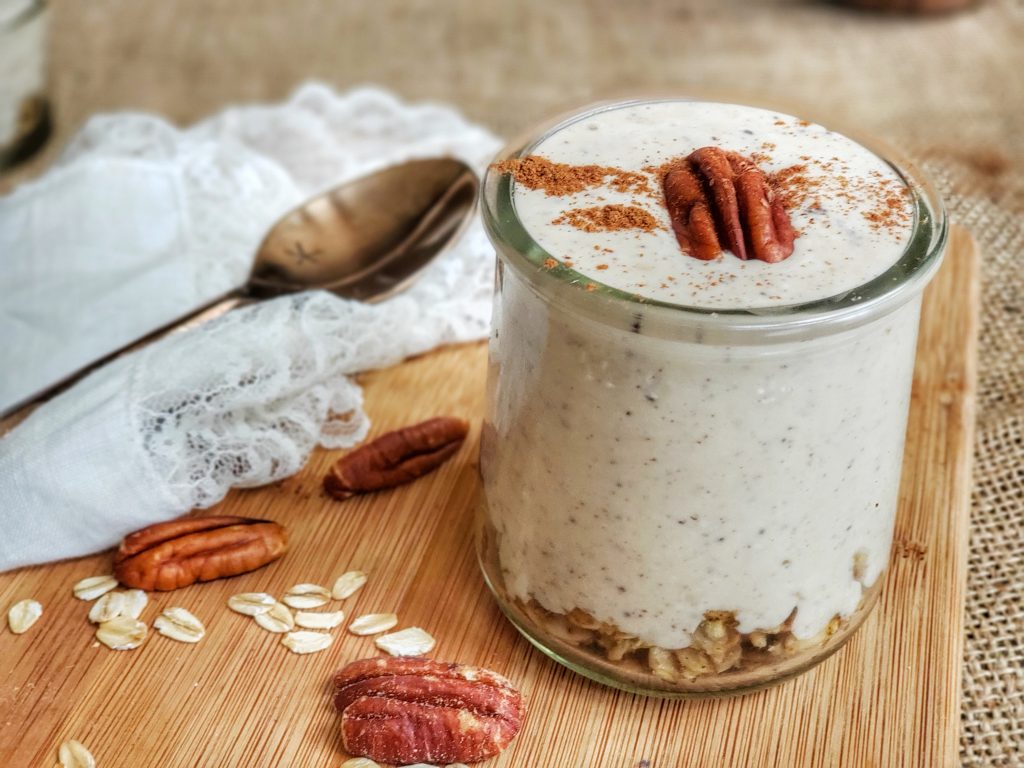
Pumpkin Scrambled Oats: Hearty, Healthy 10-minute Breakfast

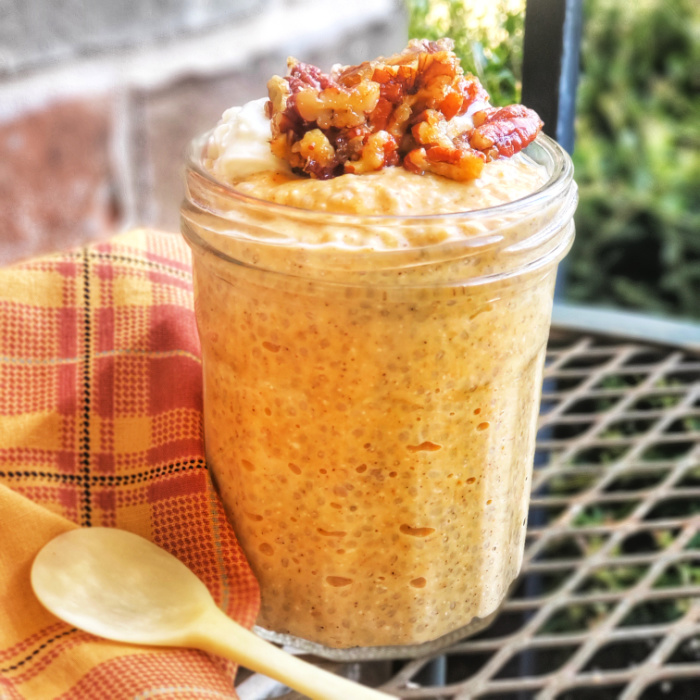
Whether you’re a runner, triathlete, gym-going fitness enthusiast or simply seeking a comforting, nutritious breakfast to jump start an active day, these Pumpkin Scrambled Oats are sure to hit the spot.  

With the flavors of fall, sustaining whole-grain carbs, and a protein boost that’ll keep you going, it’s an easy oat recipe you’ll want to revisit time and time again during this splendid season of cooler temps and endless outdoor adventures.

Simple Ingredients: Pumpkin, Greek yogurt, egg, maple syrup, oats, and pumpkin pie spice!
A 15-second Pumpkin Scrambled Oat Tutorial!

Why Make Pumpkin Scrambled Oats?

Fall Flavor Fusion: Pumpkin is the quintessential fall ingredient. It’s warm, earthy notes complement the creaminess of oatmeal beautifully – plus for the ½ cup used in this recipe, you get a lot of nutrition for about 45 added calories — plant-based carbohydrates with no added sugar, virtually no fat, a good source of vitamins (especially vitamin A / beta carotene), and minerals athletes need more of like iron and potassium.

Protein Powerhouse: If you’re an active individual or simply looking to boost your protein intake, this recipe is a game-changer. Oats and eggs provide a solid protein base that’s perfect for muscle recovery and sustained energy. Often, I will use these protein oats to add even more a boost.

Quick and Easy: This pumpkin breakfast recipe reminds me of a cross between traditional oatmeal with pumpkin to skillet granola – really, it’s like a soft pumpkin granola that you don’t have to bake. Whip this pumpkin oat recipe up in a non-stick skillet in under 10 minutes – I feel like the process is just the same as making scrambled eggs (hence the name).

How to Serve and Store: Eat warm or room temperature. Delicious plain, or add your favorite nuts/seed (I added sprouted pumpkin seeds) or add as a “crumble” topping on your yogurt, cottage cheese or smoothie bowls. Store leftovers, in air-tight container in fridge for up to 5 days. Reheat in an air-fryer or toaster oven for 3-4 minutes.

Pin this for later!

As an Amazon Influencer, I earn from qualifying purchases.

5 from 5 votes
Pumpkin Scrambled Oats are a comforting and nutritious way to jumpstart fall mornings. A quick breakfast, only 10 minutes max to make in a skillet -- simple, wholesome ingredients and 22g protein so you don't get hungry later!
Pumpkin Scrambled Oats
Prep Time
2 mins
Cook Time
8 mins
Total Time
10 mins
 

Pumpkin Scrambled Oats are a comforting and nutritious way to jumpstart fall mornings. A quick breakfast, only 10 minutes max to make in a skillet — simple, wholesome ingredients and 22g protein so you don't get hungry later!

Course: Breakfast, Snack
Keyword: breakfast, oats, pumpkin
Servings: 1 serving
Calories: 390 kcal
Ingredients
  • 1/2 cup canned pumpkin
  • 2 tbsp 0% fat Greek yogurt
  • 1 large egg
  • 1 tbsp maple syrup can omit or use a syrupy substitute if moderating carbs
  • 3/4 cup rolled oats I used @oatsome protein oats
  • 1/4 tsp pumpkin pie spice
  • Optional extras: nuts seeds, dried fruit
Instructions
  1. Mix everything up in a bowl.
  2. Bring nonstick skillet to medium heat (not too high if using the maple syrup, you don’t want the sugars in it to burn).
  3. Spread out batter in skillet, about 1/3” thick, let cook for a few minutes, then use spatula to turn over in big chunks. Cook forc a few more minutes before using spatula to “chop up” … just imagine how you would do for scrambled eggs! Cook a few more minutes, tossing frequently, until mixture drying out some.
  4. Finished product will be turning golden brown on the outside and still a bit soft — like a cross between oatmeal and skillet granola.
  5. Add mix-ins of choice, if desired. Serve warm or room temperature – either plain, in milk, on top of yogurt or cottage cheese, etc.
Recipe Notes

Pumpkin Scrambled Oats are a comforting and nutritious way to jumpstart fall mornings. A quick breakfast, only 10 minutes max to make in a skillet -- simple, wholesome ingredients and 22g protein so you don't get hungry later!

Protein Pumpkin Krispie Treats – Sugar, Dairy & Nut Free!

Protein Pumpkin Krispie Treats are a healthy interpretation on one of my most-loved childhood snacks. They are made without marshmallows (or any added sugar at all) or butter – instead I use a sugar-free syrup swap and a seed and oat butter.

You’ll feel a wave of nostalgia with every bite of these better-for-you rice krispie treats, mixed up with real pumpkin to celebrate the season. No marshmallows or added sugar, plus protein for a balanced snack – this easy recipe is a winner and works for gluten-free, nut-free, vegan diets and more.

While you can use peanut butter, or any nut butter of your choosing, I like to use the Seed & Oat Butter from Garnish because it’s free of the Top 9 Allergens. Thankfully, I don’t have food allergies, but when you have someone in your house who does and/or you want to share dishes with others who might (but you don’t know) . . . . this spread is a great option. A great solution when there are peanut allergies around. Save 20% at EatGarnish.com with my code FITFORK

Garnish Seed & Oat Butter is a tasty alternative spread if you can do peanut butter or other nut butters. It's free of the Top 9 Allergens.

The protein rice krispies are a very satisfying snack that won’t leave you hungry or in a sugar-crash 30 minutes later – they have 11g protein thanks to the addition of some protein powder and the protein in the Seed & Oat Butter.

You’ll feel a wave of nostalgia with every bite of these better-for-you rice krispie treats, mixed up with real pumpkin to celebrate the season. No marshmallows or added sugar, plus protein for a balanced snack – this easy recipe is a winner and works for gluten-free, nut-free, vegan diets and more.

TIPS FOR MAKING PUMPKIN PROTEIN RICE KRISPIE TREATS

Nut Butter: Discussed above, but you can use any nut butter you prefer. The Seed & Oat Butter is a great solution if you or your guests have any peanut or tree nut allergies.

Sweetener: I used a zero-carb simple syrup. You can also use a honey substitute or maple syrup substitute. Also using real honey or 100% maple syrup is fine too, just note that the macros of the recipe will change.

Why Flaxseed?: If you notice that the syrup is more watery than thick, use the recipe suggestion to mix in 1 tablespoon of flax seed meal into the recipe to serve as a binder/thickener. In vegan recipes, flaxseed mixed with water is often referred to as a flax egg.

Protein Powder: Again, you have the leeway in this protein krispie treat recipe to use the type of protein powder you prefer – plant-based, whey, etc. Also, there are a few flavors that will work best including vanilla, cake batter, pumpkin and even unflavored. Today I used Clean Lean Protein from Nuzest, you can save 15% with code: FITFORK

Pan Size: This no marshmallow rice crispie recipe fits into an 8”x8” brownie pan, 9”x5.5” toaster oven pan, 9”x5” load pan, or even in 8 of the tins of a muffin pan.

Storing Leftovers: This recipe is the crispiest served right upon making. However, if you have leftovers to save, keep them in an air-tight container in the fridge for up to 5 days. They will be a little softer in texture, but still delicious.

You’ll feel a wave of nostalgia with every bite of these better-for-you rice krispie treats, mixed up with real pumpkin to celebrate the season. No marshmallows or added sugar, plus protein for a balanced snack – this easy recipe is a winner and works for gluten-free, nut-free, vegan diets and more.
Pin this for later!
Protein Pumpkin Krispie Treats
Prep Time
5 mins
Total Time
20 mins
 

You’ll feel a wave of nostalgia biting into these rice krispie treats, mixed up with real pumpkin to celebrate the season. No marshmallows or added sugar, plus protein for a balanced snack – this easy recipe is a winner and works for gluten-free, nut-free, vegan diets and more.

Course: Dessert, Snack
Keyword: fall, gluten free, pumpkin, pumpkin dessert, pumpkin spice, vegan
Servings: 8 servings
Calories: 172 kcal
Ingredients
  • cup canned pumpkin puree not pumpkin pie filling
  • ½ cup Oat & Seed Butter from Garnish or nut butter of your choice
  • 1/3 cup zero-carb “syrupy” sweetener like a honey substitute or maple syrup substitute – or the real stuff if you don’t mind a higher calorie/carb count
  • 1 tbsp ground flax seed optional
  • 2/3 cup protein powder either vanilla, cake batter or pumpkin flavor
  • cup plain puffed rice cereal like Rice Krispies
Optional Chocolate Drizzle:
  • 3 Tbsp sugar-free chocolate chips
  • ½ tsp coconut oil
Instructions
  1. Line an 8”x8” brownie pan or 9”x 6” rimmed pan with parchment paper; or spray with cooking spray.
  2. Add pumpkin, oat/pumpkin butter and syrup to bowl and mix until combined. If your seed butter is thick, warm up in microwave for 10 seconds until an easier-to-stir consistency.
  3. Stir in flax seed meal. This can be omitted if you are using a thick syrup consistency sweetener. But if your sweetener is thinner, this helps serve as a thickener/binder.
  4. Stir in protein powder until combined. Mixture will be thick and pasty.
  5. Next stir in rice cereal until thoroughly coated and press down with fingers or spatula into prepared pan. Stick in freezer for 10 minutes to firm up before cutting.
  6. If you’d like to do the chocolate drizzle, add chocolate chips and coconut oil to small microwave-safe bowl and microwave/stir in 15-second increments until smooth. Drizzle over treats.
  7. Transfer back to freezer to firm up for 5 minutes before cutting into 8 bars/squares. Serve immediately.
  8. Store leftovers in air-tight container in fridge for up to 5 days. Note that the texture will be less crunchy on leftovers – but still yummy!
Recipe Notes

Note: Nutrition info w/o drizzle included

Pumpkin Spice Peanut Butter Roasted Chickpeas – Easy, Inexpensive, Satisfying Snack

If looking to add a little pumpkin spice magic to your day yet stick to your best healthy snacking intentions, Pumpkin Spice Peanut Butter Roasted Chickpeas deliver big taste in a wholesome little package. It’s also super inexpensive (about $1.50 per batch using convenience canned chickpeas) compared to the $5-$10 dollars I see for other bagged “healthy” snacks.

Pumpkin Spice Peanut Butter Roasted Chickpeas – a yummy treat that isn’t so scary for the season. 10g of protein per serving (perfect for a healthy snack), 4g fiber and 198 calories. Easy-peasy to make, using canned chickpeas and I even baked mine in the toaster oven!

Made with simple, good-for-you ingredients including chickpeas, peanut butter powder, olive oil, and pumpkin pie spice blend. These are pantry items I typically always have on hand, meaning that a better-for-me snack filled with protein, fiber and a satisfying crunch can be whipped up whenever the mood strikes.

Roasted chickpeas are great snack choice to take on the go as they don’t need refrigeration, utensils or leave greasy or grainy residue on your hands. Plus, they give you that sustaining energy boost thanks to a nicely balanced profile of 10g protein, 28g carb (4g of fiber), and 6g of fat.

Pumpkin Spice Peanut Butter Roasted Chickpeas – a yummy treat that isn’t so scary for the season. 10g of protein per serving (perfect for a healthy snack), 4g fiber and 198 calories. Easy-peasy to make, using canned chickpeas and I even baked mine in the toaster oven!

TIPS: PUMPKIN SPICE PEANUT BUTTER ROASTED CHICKPEAS

2-step Roasting: The chickpeas roast in two segments – first, about 20-25 minutes plain and unoiled or seasoned and second, another 5 minutes after being coated with the spice mixture. The spice coating isn’t added at the front end (like many savory recipes) because the natural sugars in the maple syrup (or any other sweet flavor) would burn and become bitter if they had to endure too much time in the oven.

Ingredient Substitutions: You can replace 15-oz can of canned chickpeas with 1 ½ cups homemade (just don’t season them). The peanut butter powder can be replaced with almond butter powder in the same amount. Also, you can swap the olive oil for coconut oil or avocado oil. You can swap the maple syrup for honey. If you don’t have pumpkin pie spice blend, you can substitute an equal amount of ground cinnamon and pinch of nutmeg.

Skinning Chickpeas: Once you rinse and drain canned chickpeas, pour them out onto a clean dishcloth or paper towels and gently rub while rolling around to remove the outer seed coat (skin) – while it is definitely edible, rich in fiber and nutrients (so don’t worry if you miss a few), it has a tendency to fall off and burn during roasting.

Scaling Up & Pans: It’s easy to double or triple or go higher on this peanut butter chickpea recipe by simply increasing all the ingredients in the same ratio. However, note that your pan size will increase as the chickpeas need to roast in a single layer (don’t pile them up). One batch can be done in a 9”x6” toaster oven pan (I like this non-stick toaster oven pan), a 9”x9” brownie pan or a standard cake layer pan. Two to three batches can be accommodated on a standard rimmed baking sheet. Anything higher, you’ll have to go to two pans or more.

Storing Leftovers: Keep leftover pumpkin spice chickpeas in an airtight container or plastic zip-top bag (I like reusable zip storage bags). They can stay on the counter for about a week (if they even last that long!). I’ve not tried freezing them, so I can’t recommend.

Pumpkin Spice Peanut Butter Roasted Chickpeas – a yummy treat that isn’t so scary for the season. 10g of protein per serving (perfect for a healthy snack), 4g fiber and 198 calories. Easy-peasy to make, using canned chickpeas and I even baked mine in the toaster oven!
Pin this for later!
5 from 5 votes
Pumpkin Spice Peanut Butter Roasted Chickpeas – a yummy treat that isn’t so scary for the season. 10g of protein per serving (perfect for a snack), 4g fiber and 198 calories. Easy-peasy to make, using canned chickpeas and I even baked mine in the toaster oven!
Pumpkin Spice Peanut Butter Roasted Chickpeas
Prep Time
5 mins
Cook Time
25 mins
Total Time
30 mins
 

Pumpkin Spice Peanut ButterRoasted Chickpeas – a yummy treat that isn’t so scary for the season. 10g ofprotein per serving (perfect for a healthy snack), 4g fiber and 198 calories. Easy-peasyto make, using canned chickpeas and I even baked mine in the toaster oven!

Course: Snack
Keyword: chickpeas, peanut butter, pumpkin spice
Servings: 3 servings
Ingredients
  • 1 15- oz can chickpeas drained and rinsed
  • 2 teaspoons olive oil or melted coconut oil
  • 4 teaspoons maple syrup
  • 2 tablespoons peanut butter powder or almond butter powder
  • 1/2 teaspoon ground pumpkin pie spice
  • 1/8 teaspoon fine sea salt
Instructions
  1. Drain and rinse can of chickpeas. Pour out on a dry dishcloth or paper towels and gently rub any “skins” off, discarding. Let dry while oven preheats to 400F degrees.
  2. Line small rimmed baking sheet in parchment paper or a silicone baking sheet.
  3. Bake for 20 minutes, stopping to shake or stir up the pan once or twice to encourage even roasting. Remove from oven and temporarily set aside, but keep oven on.
  4. In smallish bowl, mix together oil, nut butter powder, pumpkin pie spice and salt until it forms a thin paste.
  5. Pour in pan the pan of baked chickpeas and stir until evenly coated. Return to baking sheet, spreading out in a single layer. Cook again at 400F for 5- 6 minutes, stirring halfway through.

  6. Let cool, enjoy! Store leftovers in an air-tight container for up to a week.
Recipe Notes

Note: This post contains affiliate links. Commissions are used to offset operating expenses for The Fit Fork.
Homemade Banana Bread Protein Granola

If you always loved grandma’s banana bread, you’ll love this homemade granola recipe that tastes like a hug from her oven. My Banana Bread Protein Granola is a great way to start the day or kick back with as a wholesome snack – or to use as an topping for yogurt parfaits, baked fruit desserts or smoothie bowls.

Banana Bread Protein Granola is an easy homemade breakfast or snack you can make in about 30 minutes. It's much more economical than store bought and you have control over the ingredients -- I've used a protein powder to give this healthy treat 13g protein per serving.

Banana Bread Granola with Protein Powder is is easy to make, economical, and features lots of wholesome ingredients including oats, protein powder + nuts, seeds and oats. Offering almost 14g protein per serving, lots of whole grain energy, and dietary fiber – it’s definitely a winner!

Ingredients for Banana Bread PRotein Granola from thefitfork.com - Oatsome oats help boost the protein and fiber.

Whip up the batter that starts with a mixture of protein powder whisked into water, egg white and melted butter. That’s used to coat the oats, nuts and seeds before baking in the oven. While baking, this homemade banana granola recipe fills the house with a delicious, comforting aroma that tastes as yummy as it smells. After cooling and breaking into clusters, this banana protein granola has a crunchy texture with the larger pieces remaining slightly soft int the center – it’s delightful!

Note: I like to  Protein Oats (thick cut rolled oats) from Oatsome– the only ingredient is oats, but thanks to the way they are cut thicker, you get 40% more protein than traditional oats  — plus14% DV for dietary fiber.  

Banana Bread Protein Granola is an easy homemade breakfast or snack you can make in about 30 minutes. It's much more economical than store bought and you have control over the ingredients -- I've used a protein powder to give this healthy treat 13g protein per serving. Get more recipes at thefitfork.com

Tips for Making Banana Bread Protein Granola

Oats: While I used thicker-cut rolled oats, traditional rolled oats (aka: old-fashioned oats) will work just the same. Just do NOT substitute instant oats or steel-cut oats, the texture will be off with both those.

Protein Powder: I use a cake batter whey protein for this recipe. I like the cake batter flavor because it lends a buttery vanilla vibe that reminds me of all sorts of nostalgic homemade baked goods. A vanilla protein powder would work well also – and you can even add a ½ teaspoon of cake batter extract (optional).
Nuts: I’ve used chopped pecans in this banana bread granola, because traditionally that’s an ingredient that my grandmother used in her banana bread loaves (and, as a kid living in the South, I was often assigned to gather the pecans falling of the trees). But, you can swap for almond slivers or another nut – or a combination of nuts — if you prefer.
Extra Mix-Ins: I’ve left this banana pecan granola recipe pretty simple, but if you’d like to add some extra mix-ins (up to 1/4 to ½ cup total), please do! Extra seeds, nuts and shredded coconut can be added to the mixture before baking, BUT mix in items like dried fruit, chocolate chips and such AFTER the granola has baked and cooled to room temperature.

Baking Gear: I suggest baking the banana granola on a rimmed baking sheet (so nothing slides off!) that has been lined with a silicon baking sheet or parchment paper to prevent sticking (I personally love the convenience of the this pre-cut sheet pan parchment paper).

Storage: Store prepared and cooled granola at room temperature in an air-tight container (like a large, hinged canning glass jar) or zip-top plastic bag. Because this granola has a crunch outside but slightly soft center in cluster pieces, it won’t last as long as those super dry granolas from the store. Use up within the week (that’s not hard to do!) or transfer to the freezer for use later.

Note: This post contains affiliate links. I may earn a small commission from any sales generated. Those proceeds are used to offset operating expenses for The Fit Fork. Thank you!

Jennifer Fisher, thefitfork.com -- banana bread protein granola, an easy homemade snack or breakfast with 13g protein.
5 from 5 votes
Banana Bread Protein Granola is an easy homemade breakfast or snack you can make in about 30 minutes. It's much more economical than store bought and you have control over the ingredients -- I've used a protein powder to give this healthy treat 13g protein per serving. Visit thefitfork.com for more recipes to fuel your active lifestyle
Banana Bread Protein Granola
Prep Time
5 mins
Cook Time
25 mins
Total Time
30 mins
 

Banana Bread Protein Granola is an easy homemade breakfastor snack you can make in about 30 minutes. It's much more economical than storebought and you have control over the ingredients — I've used a protein powderto give this healthy treat 13g protein per serving.

Course: Breakfast, Snack
Keyword: banana, banana bread, granola, protein powder
Servings: 6 servings
Ingredients
  • ¼ cup water
  • ½ cup birthday cake cake batter or vanilla flavored protein powder
  • 1 egg white or 2 tbsp from a carton
  • ¼ cup butter melted
  • ½ large ripe banana mashed
  • ¼ cup stevia baking blend or similar 1:1 measure equivalent sweetener
  • 2 tbs chia seeds
  • 2 tsp ground cinnamon
  • ¼ tsp salt
  • 2.5 cups old fashioned rolled oats like Oatsome thick-cut rolled protein oats
  • ½ cup chopped pecans
  • Optional Mix ins See Note
Instructions
  1. Preheat oven to 325F.

  2. Whisk together water and protein powder in mixing bowl.
  3. Whisk in egg white, then melted butter.
  4. Add ripe banana and mash in well to mixture with fork or spatula.
  5. Stir in sweetener, chia seeds, ground cinnamon and salt until well combined. Finally, stir in oats and pecans and stir until evenly coated.
  6. Pour out onto rimmed baking sheet (lined with silicone baking sheet or parchment paper) and pat down into an even layer, about 1/3 to ½” thick.
  7. Bake for 24 to 26 minutes, using spatula to gently flip hallway through – keeping large clumps intact.

  8. Remove from oven when turning deep golden brown, let cook on sheet for at least 10 minutes before breaking up into desired-size clusters.
Recipe Notes

Optional Mix Ins: May mix in another ¼ to ½ cup nuts, seeds or shredded coconut into wet batter before baking. Or you can add a similar amount of dried fruit or chocolate chips after the granola has baked and cooled to room temperature.

Sugar-free “Like Magic” Shell Dessert Topping for Healthy Sweets

If you were a kid in the 80s and 90s, you surely remember “Magic Shell”, a popular dessert topping known for its ability to harden quickly when poured onto cold surfaces. In fact, Magic Shell can still be purchased in-store and online today.

Drizzle, dunk or dip! This Sugar-free “Like Magic” Shell Dessert Topping with have you fondly reminiscing about being a kid! A simple, two-ingredient chocolate sauce recipe with unlimited uses for your dessert creations.

However, as a now grown-up girl-at-heart, who likes to manage both her carb count and pocketbook, I like to make my own no-sugar like magic shell chocolate sauce using just two ingredients – sugar free chocolate chips and coconut oil!  THAT’S IT!

Drizzle, dunk or dip! This Sugar-free “Like Magic” Shell Dessert Topping with have you fondly reminiscing about being a kid! A simple, two-ingredient chocolate sauce recipe with unlimited uses for your dessert creations.

To make a generous, 2-serving batch just add 1-ounce sugar free chocolate chips (about 3 tbsp) to a small microwave-safe bowl and add 1 teaspoon of coconut oil – it’s fine if still in solid form, it all melts together! Next, microwave for about 35-45 seconds until melting, then stir together until glossy and smooth. If you want a bigger batch, simply use the same 1 oz chocolate to 1 tsp coconut oil ratio – you may need to microwave a little longer to accommodate the larger volume.

.So, now that the chocolate sauce that hardens is done, it will work its “magic” by solidifying on contact with cold items – the coconut oil helps make it easy to drizzle, but then reverts back to its solid state after cooling! You can speed up the hardening process further by sticking your drizzled, dunked and dipped items into the fridge for a minute or two afterward.

FUN WAYS TO USE SUGAR-FREE “LIKE MAGIC” SHELL TOPPING 

Frozen Treats: Pour over ice cream and frozen yogurt. Even dunk popsicles into it!

Cold Desserts: Yogurt parfaits, trifles, frozen pies, cheesecakes and more.

Drink Rims: Add to the rim of a cold cocktail glass before filling – what a fun and delicious surprise!

Decorative Designs: Write a name or “draw” a design on a chilled plate or serving dish before placing ice cream or desserts on them.

Dipped & Drizzled Treats: Dip cookies, pretzels, marshmallows, or other snacks into hardening chocolate sauce quick chocolate coating. Try drizzling on popcorn that’s cooled and then tossing on coarse sea salt – -so good!

Fruit: Dip fresh fruits like strawberries, bananas, and apple slices into the sugar-free chocolate topping or drizzle across a bowl or tray full of fruit.

Drizzle, dunk or dip! This Sugar-free “Like Magic” Shell Dessert Topping with have you fondly reminiscing about being a kid! A simple, two-ingredient chocolate sauce recipe with unlimited uses for your dessert creations.

 TIPS FOR MAKING & STORING SUGAR-FREE HARDENING CHOCOLATE SAUCE

No water. Don’t add any water to this recipe to thin it out — that’s going to mess it up. In fact, ensure that the bowl you are using to melt chocolate chips in is completely dry and free of moisture.

Choosing Chocolate Chips: You can use any chocolate chip that works for your dietary eating pattern – sugar-free or dairy-free or traditional style made with sugar. You can also choose another flavor of chip such as white chocolate, butterscotch, peanut butter, and such.

Oil Substitutions: NO! Do not substitute coconut oil for another oil – it will not harden back up in the same way and sauce will remain runny.  Also, do NOT use coconut oil that has been “fractionated”, a processing step that keeps it in a liquid state at room temperature. Only use regular coconut oil that will appear solid at room temperature (under 78 degrees). 

Application: Simply spoon the sugar-free magic shell onto its final destination or use a small drizzle bottle. I personally like to use a mini mason jar (2-oz), because I can also use that jar to melt the chocolate – so less mess!

Storage: Do not store leftovers in the fridge. Instead, cover tightly and keep on counter or pantry, until needed – it really doesn’t go bad (or, I’ve always gobbled mine up before it has – I’m sure it would take months). If it’s a colder day, you may need to pop it in the microwave for 5-10 seconds to make more pourable.

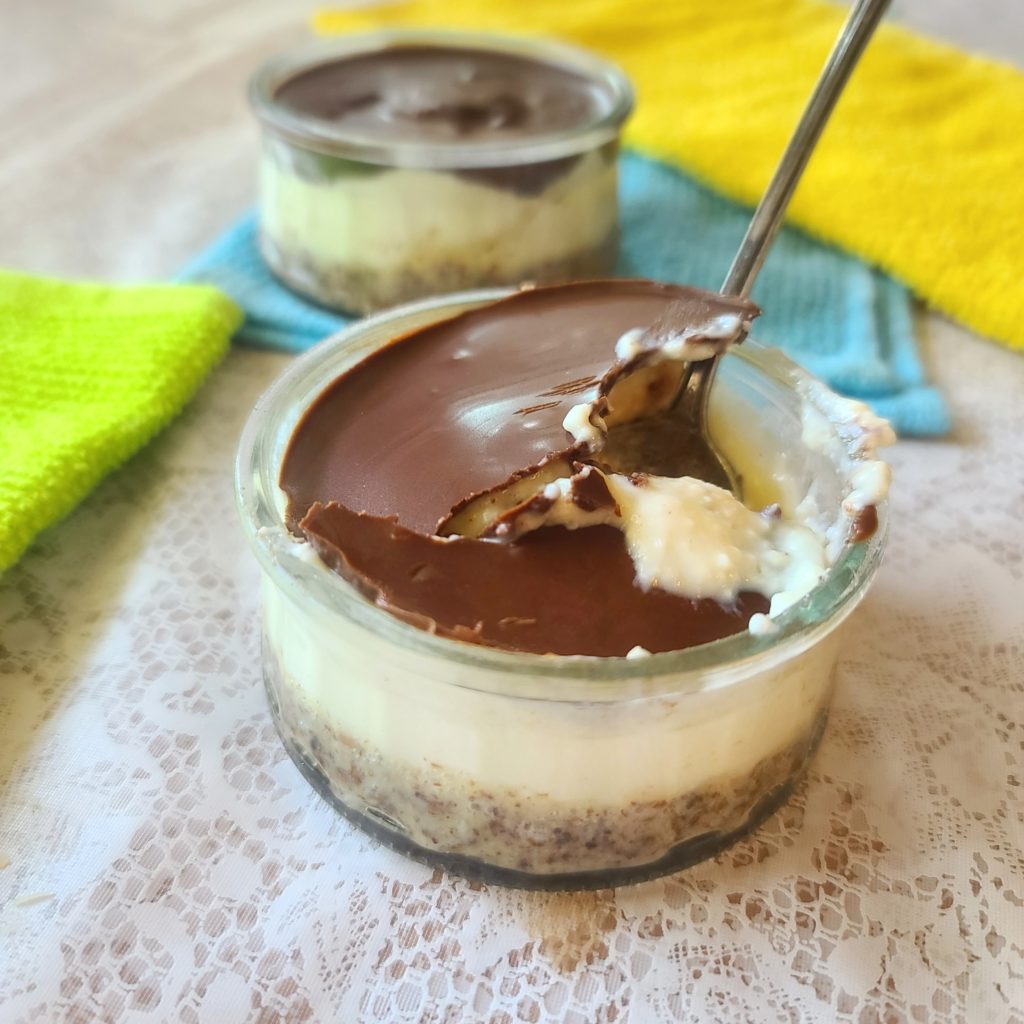
I like to use this sugar-free magic shell sauce on my protein cheesecakes, it adds a lot of fun, flavor and flair — and I don’t have to worry about excess sugar.

Get the recipe for Boston Cream Pie Protein Cheesecake.

Note: This post contains affiliate links and I may earn a small commission on purchases — which I use to offset operating expense for The Fit Fork. Thank you!

Drizzle, dunk or dip! This Sugar-free “Like Magic” Shell Dessert Topping with have you fondly reminiscing about being a kid! A simple, two-ingredient chocolate sauce recipe with unlimited uses for your low carb dessert creations.