Protein Pumpkin Krispie Treats – Sugar, Dairy & Nut Free!

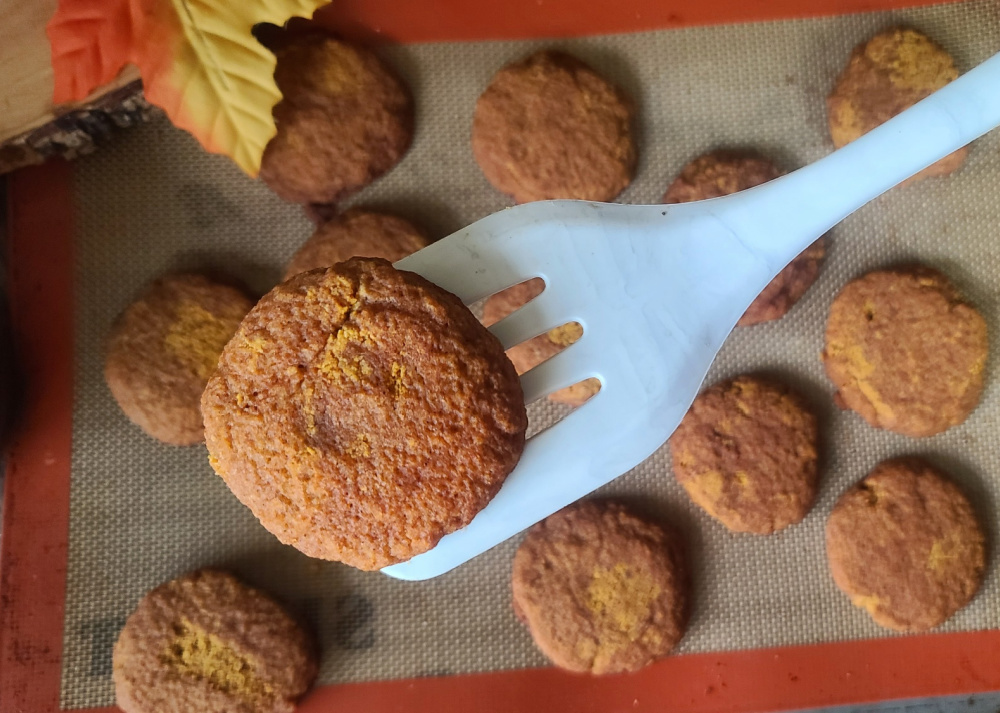
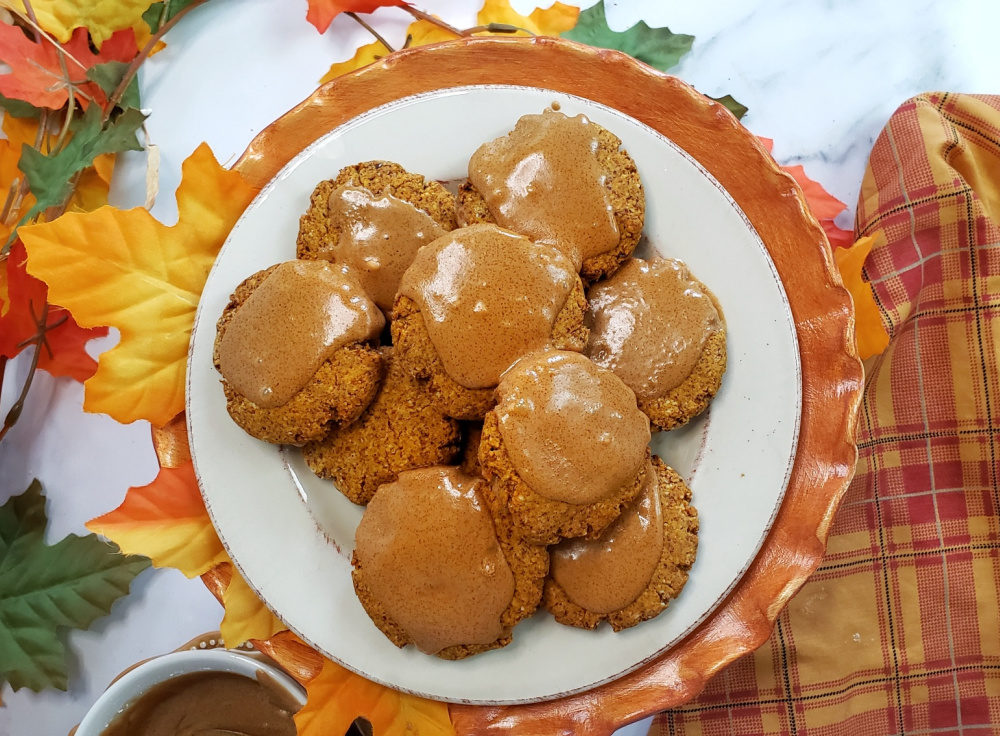
Protein Pumpkin Krispie Treats are a healthy interpretation on one of my most-loved childhood snacks. They are made without marshmallows (or any added sugar at all) or butter – instead I use a sugar-free syrup swap and a seed and oat butter.

You’ll feel a wave of nostalgia with every bite of these better-for-you rice krispie treats, mixed up with real pumpkin to celebrate the season. No marshmallows or added sugar, plus protein for a balanced snack – this easy recipe is a winner and works for gluten-free, nut-free, vegan diets and more.

While you can use peanut butter, or any nut butter of your choosing, I like to use the Seed & Oat Butter from Garnish because it’s free of the Top 9 Allergens. Thankfully, I don’t have food allergies, but when you have someone in your house who does and/or you want to share dishes with others who might (but you don’t know) . . . . this spread is a great option. A great solution when there are peanut allergies around. Save 20% at EatGarnish.com with my code FITFORK

Garnish Seed & Oat Butter is a tasty alternative spread if you can do peanut butter or other nut butters. It's free of the Top 9 Allergens.

The protein rice krispies are a very satisfying snack that won’t leave you hungry or in a sugar-crash 30 minutes later – they have 11g protein thanks to the addition of some protein powder and the protein in the Seed & Oat Butter.

You’ll feel a wave of nostalgia with every bite of these better-for-you rice krispie treats, mixed up with real pumpkin to celebrate the season. No marshmallows or added sugar, plus protein for a balanced snack – this easy recipe is a winner and works for gluten-free, nut-free, vegan diets and more.

TIPS FOR MAKING PUMPKIN PROTEIN RICE KRISPIE TREATS

Nut Butter: Discussed above, but you can use any nut butter you prefer. The Seed & Oat Butter is a great solution if you or your guests have any peanut or tree nut allergies.

Sweetener: I used a zero-carb simple syrup. You can also use a honey substitute or maple syrup substitute. Also using real honey or 100% maple syrup is fine too, just note that the macros of the recipe will change.

Why Flaxseed?: If you notice that the syrup is more watery than thick, use the recipe suggestion to mix in 1 tablespoon of flax seed meal into the recipe to serve as a binder/thickener. In vegan recipes, flaxseed mixed with water is often referred to as a flax egg.

Protein Powder: Again, you have the leeway in this protein krispie treat recipe to use the type of protein powder you prefer – plant-based, whey, etc. Also, there are a few flavors that will work best including vanilla, cake batter, pumpkin and even unflavored. Today I used Clean Lean Protein from Nuzest, you can save 15% with code: FITFORK

Pan Size: This no marshmallow rice crispie recipe fits into an 8”x8” brownie pan, 9”x5.5” toaster oven pan, 9”x5” load pan, or even in 8 of the tins of a muffin pan.

Storing Leftovers: This recipe is the crispiest served right upon making. However, if you have leftovers to save, keep them in an air-tight container in the fridge for up to 5 days. They will be a little softer in texture, but still delicious.

You’ll feel a wave of nostalgia with every bite of these better-for-you rice krispie treats, mixed up with real pumpkin to celebrate the season. No marshmallows or added sugar, plus protein for a balanced snack – this easy recipe is a winner and works for gluten-free, nut-free, vegan diets and more.
Pin this for later!
Protein Pumpkin Krispie Treats
Prep Time
5 mins
Total Time
20 mins
 

You’ll feel a wave of nostalgia biting into these rice krispie treats, mixed up with real pumpkin to celebrate the season. No marshmallows or added sugar, plus protein for a balanced snack – this easy recipe is a winner and works for gluten-free, nut-free, vegan diets and more.

Course: Dessert, Snack
Keyword: fall, gluten free, pumpkin, pumpkin dessert, pumpkin spice, vegan
Servings: 8 servings
Calories: 172 kcal
Ingredients
  • cup canned pumpkin puree not pumpkin pie filling
  • ½ cup Oat & Seed Butter from Garnish or nut butter of your choice
  • 1/3 cup zero-carb “syrupy” sweetener like a honey substitute or maple syrup substitute – or the real stuff if you don’t mind a higher calorie/carb count
  • 1 tbsp ground flax seed optional
  • 2/3 cup protein powder either vanilla, cake batter or pumpkin flavor
  • cup plain puffed rice cereal like Rice Krispies
Optional Chocolate Drizzle:
  • 3 Tbsp sugar-free chocolate chips
  • ½ tsp coconut oil
Instructions
  1. Line an 8”x8” brownie pan or 9”x 6” rimmed pan with parchment paper; or spray with cooking spray.
  2. Add pumpkin, oat/pumpkin butter and syrup to bowl and mix until combined. If your seed butter is thick, warm up in microwave for 10 seconds until an easier-to-stir consistency.
  3. Stir in flax seed meal. This can be omitted if you are using a thick syrup consistency sweetener. But if your sweetener is thinner, this helps serve as a thickener/binder.
  4. Stir in protein powder until combined. Mixture will be thick and pasty.
  5. Next stir in rice cereal until thoroughly coated and press down with fingers or spatula into prepared pan. Stick in freezer for 10 minutes to firm up before cutting.
  6. If you’d like to do the chocolate drizzle, add chocolate chips and coconut oil to small microwave-safe bowl and microwave/stir in 15-second increments until smooth. Drizzle over treats.
  7. Transfer back to freezer to firm up for 5 minutes before cutting into 8 bars/squares. Serve immediately.
  8. Store leftovers in air-tight container in fridge for up to 5 days. Note that the texture will be less crunchy on leftovers – but still yummy!
Recipe Notes

Note: Nutrition info w/o drizzle included

Turmeric Deviled Eggs that Look Like Autumn Pumpkins

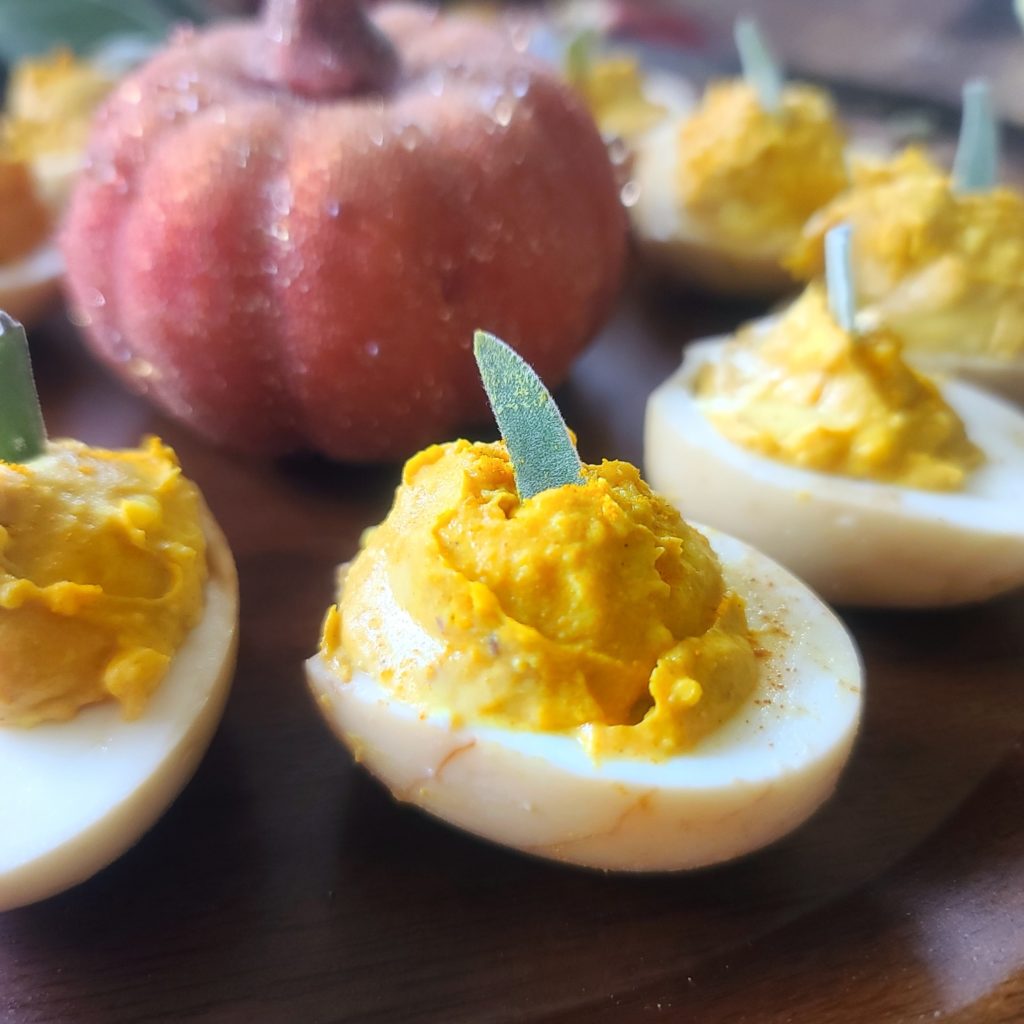
It’s going to be an egg-celent Halloween! Tea & Turmeric Spiced Deviled Eggs bring healthy balance to the season’s sugary treats. Plus, the center yolk filling looks like a little pumpkin thanks to the vibrant hue of turmeric and a tiny piece of sage sticking out of the top for a stem. Of course, you can eat these ANY time of year!

These clever deviled eggs look like little autumn pumpkins, but contain no squash – only eggs, Dijon mustard, salt, pepper and turmeric for the signature orange hue of the season.  Low in calories, high in protein – a smart snack for Halloween, Thanksgiving or any fall festival.  

These pumpkin deviled eggs (no actual pumpkin in the recipe) are ridiculously easy to make. After eggs are hard boiled, they soak in a black tea- soy sauce mixture. That dark mixture “stains” the cracks and crevices. When peeled, they will look crazed and delightfully rotten. The longer you leave chilled in the tea soak (2-24 hours), the better the markings will come out. I got a little impatient on this batch, lol!

These clever deviled eggs look like little autumn pumpkins, but contain no squash – only eggs, Dijon mustard, salt, pepper and turmeric for the signature orange hue of the season.  Low in calories, high in protein – a smart snack for Halloween, Thanksgiving or any fall festival.  

Ground turmeric is the secret ingredient that makes the filling orange and perfect Halloween deviled eggs and Thanksgiving deviled eggs. Bonus, it’s an anti-inflammatory superfood. The health benefits of turmeric are bountiful, and very helpful for an athlete or person pursing an active lifestyle.

Turmeric, which contains the plant compound curcumin has been shown to have analgesic properties and anti-inflammatory effects. Inflammation is a natural response to exercise and can lead to muscle soreness and fatigue, and incorporating turmeric into your diet may help expedite workout recovery.  P.S. My Turmeric Mashed Potatoes are another favorite turmeric recipe I use to fuel workouts.

After mashing up the yolks with mayo of choice, it’s time to fill the egg white centers. I’ve NEVER been good with a piping bag to make it look pretty – but the best hack ever is to use a spring-loaded melon-baller (or cookie scoop) to gather up the filling and plop nicely on the of the eggs. Another tip to slicing the eggs in half cleanly and nicely is to use a drafted blade knife. Little bits of fresh sage make “stems” for these fall deviled eggs – you could also substitute another herb. This is a fun and festive Halloween snack that comes out cute ever time without having to be a professional food stylist (trust me, I don’t have the patience!).

These clever deviled eggs look like little autumn pumpkins, but contain no squash – only eggs, Dijon mustard, salt, pepper and turmeric for the signature orange hue of the season.  Low in calories, high in protein – a smart snack for Halloween, Thanksgiving or any fall festival.  
5 from 5 votes
These clever deviled eggs look like little autumn pumpkins, but contain no squash – only eggs, Dijon mustard, salt, pepper and turmeric for the signature orange hue of the season. Low in calories, high in protein – a smart snack for Halloween, Thanksgiving or any fall festival.
Tea & Turmeric Spiced Deviled Eggs for Halloween and Thanksgiving
Prep Time
8 mins
Cook Time
12 mins
Total Time
2 hrs 20 mins
 

These clever deviled eggs look like little autumn pumpkins, but contain no squash – only eggs, Dijon mustard, salt, pepper and turmeric for the signature orange hue of the season.  Low in calories, high in protein – a smart snack for Halloween, Thanksgiving or any fall festival.  

Course: Appetizer, Snack
Keyword: autumn, eggs, halloween, thanksgiving, tumeric
Servings: 12 pieces
Ingredients
  • 6 hard-boiled eggs unpeeled
  • 4 black tea bags
  • 2 cups water possible more
  • ¼ cup soy sauce
  • ¼ cup Mayonnaise of choice
  • 1 tsp ground turmeric
  • 1 tsp. yellow mustard
  • Salt and ground pepper to taste
  • Fresh sage snipped into little “stems”
Instructions
  1. Heat about 2 to 2.5 cups water in large, microwave-safe dish and add 4 black tea bags. Add soy sauce and let all steep for 10 minutes or so while you prepare the eggs.
  2. Prepare hard-boiled eggs per your preferred method. I cover eggs just barely with cold water and bring to a rolling boil for 1 minute. Then I cover and turn off the heat for 12 minutes, followed by removing from pot and into a bowl of cold ice-water.
  3. Crack the shells of the hard-boiled eggs gently with a spoon. Do not remove the shell.
  4. Put the cracked eggs in the tea mixture and refrigerate for at least 2 hours.
  5. Remove eggs from the refrigerator, peel carefully, and cut eggs in half lengthwise.
  6. Scoop out the egg yolks and transfer to a bowl.
  7. Set the whites aside.
  8. Mash the yolks with the mayonnaise, turmeric, mustard, and salt/pepper. Use a melon-baller to scoop the mixture into the egg white cavities.
  9. Garnish with snipped fresh sage.

Recipe Notes

Sugar-free “Like Magic” Shell Dessert Topping for Healthy Sweets

If you were a kid in the 80s and 90s, you surely remember “Magic Shell”, a popular dessert topping known for its ability to harden quickly when poured onto cold surfaces. In fact, Magic Shell can still be purchased in-store and online today.

Drizzle, dunk or dip! This Sugar-free “Like Magic” Shell Dessert Topping with have you fondly reminiscing about being a kid! A simple, two-ingredient chocolate sauce recipe with unlimited uses for your dessert creations.

However, as a now grown-up girl-at-heart, who likes to manage both her carb count and pocketbook, I like to make my own no-sugar like magic shell chocolate sauce using just two ingredients – sugar free chocolate chips and coconut oil!  THAT’S IT!

Drizzle, dunk or dip! This Sugar-free “Like Magic” Shell Dessert Topping with have you fondly reminiscing about being a kid! A simple, two-ingredient chocolate sauce recipe with unlimited uses for your dessert creations.

To make a generous, 2-serving batch just add 1-ounce sugar free chocolate chips (about 3 tbsp) to a small microwave-safe bowl and add 1 teaspoon of coconut oil – it’s fine if still in solid form, it all melts together! Next, microwave for about 35-45 seconds until melting, then stir together until glossy and smooth. If you want a bigger batch, simply use the same 1 oz chocolate to 1 tsp coconut oil ratio – you may need to microwave a little longer to accommodate the larger volume.

.So, now that the chocolate sauce that hardens is done, it will work its “magic” by solidifying on contact with cold items – the coconut oil helps make it easy to drizzle, but then reverts back to its solid state after cooling! You can speed up the hardening process further by sticking your drizzled, dunked and dipped items into the fridge for a minute or two afterward.

FUN WAYS TO USE SUGAR-FREE “LIKE MAGIC” SHELL TOPPING 

Frozen Treats: Pour over ice cream and frozen yogurt. Even dunk popsicles into it!

Cold Desserts: Yogurt parfaits, trifles, frozen pies, cheesecakes and more.

Drink Rims: Add to the rim of a cold cocktail glass before filling – what a fun and delicious surprise!

Decorative Designs: Write a name or “draw” a design on a chilled plate or serving dish before placing ice cream or desserts on them.

Dipped & Drizzled Treats: Dip cookies, pretzels, marshmallows, or other snacks into hardening chocolate sauce quick chocolate coating. Try drizzling on popcorn that’s cooled and then tossing on coarse sea salt – -so good!

Fruit: Dip fresh fruits like strawberries, bananas, and apple slices into the sugar-free chocolate topping or drizzle across a bowl or tray full of fruit.

Drizzle, dunk or dip! This Sugar-free “Like Magic” Shell Dessert Topping with have you fondly reminiscing about being a kid! A simple, two-ingredient chocolate sauce recipe with unlimited uses for your dessert creations.

 TIPS FOR MAKING & STORING SUGAR-FREE HARDENING CHOCOLATE SAUCE

No water. Don’t add any water to this recipe to thin it out — that’s going to mess it up. In fact, ensure that the bowl you are using to melt chocolate chips in is completely dry and free of moisture.

Choosing Chocolate Chips: You can use any chocolate chip that works for your dietary eating pattern – sugar-free or dairy-free or traditional style made with sugar. You can also choose another flavor of chip such as white chocolate, butterscotch, peanut butter, and such.

Oil Substitutions: NO! Do not substitute coconut oil for another oil – it will not harden back up in the same way and sauce will remain runny.  Also, do NOT use coconut oil that has been “fractionated”, a processing step that keeps it in a liquid state at room temperature. Only use regular coconut oil that will appear solid at room temperature (under 78 degrees). 

Application: Simply spoon the sugar-free magic shell onto its final destination or use a small drizzle bottle. I personally like to use a mini mason jar (2-oz), because I can also use that jar to melt the chocolate – so less mess!

Storage: Do not store leftovers in the fridge. Instead, cover tightly and keep on counter or pantry, until needed – it really doesn’t go bad (or, I’ve always gobbled mine up before it has – I’m sure it would take months). If it’s a colder day, you may need to pop it in the microwave for 5-10 seconds to make more pourable.

I like to use this sugar-free magic shell sauce on my protein cheesecakes, it adds a lot of fun, flavor and flair — and I don’t have to worry about excess sugar.

Get the recipe for Boston Cream Pie Protein Cheesecake.

Note: This post contains affiliate links and I may earn a small commission on purchases — which I use to offset operating expense for The Fit Fork. Thank you!

Drizzle, dunk or dip! This Sugar-free “Like Magic” Shell Dessert Topping with have you fondly reminiscing about being a kid! A simple, two-ingredient chocolate sauce recipe with unlimited uses for your low carb dessert creations.

Sugar-Free Strawberry Protein Cupcakes with Vanilla Ganache Icing

I “heart” strawberries, cupcakes, licking icing out of the bowl and all sweet things. But, I also love sugar free dessert recipes and avoiding traditional sugar and adding more protein into my diet to support my active lifestyle and workout recovery. My recipe for Sugar-free Strawberry Protein Cupcakes (or “protein cakelettes” if you will!) satisfies my cravings and feels like a special gourmet treat (although so simple to make).

I love to use protein powder and alternative sweeteners to create healthier dessert options that will satisfy my sweet tooth yet not wreak havoc on my (mostly) healthy diet.

Clean Lean Protein Powder from Nuzest is my favorite! Save 15% with code FITFORK

These little cupcakes with strawberry protein powder are fun and easy to make – and enjoy in your healthy lifestyle without guilt! Each cupcake has approximately 125 calories, 8g protein, 6g fat and 5g net carb. Honestly, I’ve had a couple for breakfast today, and I’m standing by that as a smart choice!

SUGAR-FREE PROTEIN CUPCAKES & VARIATIONS

The cool thing about this protein powder cupcakes recipe is that it can be tweaked here and there to suit your preferences!

VARY the protein powder type: I used Nuzest strawberry protein powder (FITFORK is my 15% discount code). It’s a plant-based and easy to digest IMO, but you can also use a whey protein. I’m also thinking collagen powder would work too, but I haven’t tried that yet.

SAve 15% on Nuzest protein powder with code FITFORK

CHANGE the flavor: I have a fondness for recipes with strawberry protein powder, but you can also use vanilla, chocolate, birthday cake or whatever flavor you like! I used Strawberry Clean Lean Protein (plant-based) from Nuzest. Save 15% with code FITFORK.

SWAP the sweetener: I used erythritol, but any granulated sweetener that measures approximately 1-to-1 with regular table sugar will work. Look and stevia, monk fruit, xylitol, and blends. Coconut sugar will also work . . . or even traditional brown sugar or table sugar. No judgement.

LEVEL UP your baking vessel: Try a silicone cupcake mold like shown (3.5 oz. capacity), a standard muffin tin (also 3.5 oz), 4- to 5-oz ramekins, or even a 9” round cake pan.

SWITCH UP the icing: Instead of sugar-free vanilla chips, use any type of baking chip such as dark chocolate, milk chocolate, peanut butter, etc. All will work well to make a ganache-style icing.

ADD ON any type of topping: While the vanilla strawberry ganache icing is still warm, any type of small topping décor will adhere well – a different crushed dehydrated fruit options, chopped nuts, sprinkles, coconut shreds are all other yummy ideas!

Silicone molds make this protein cupcake feel fancy, but standard muffin tins or ramekins work too!

Note: This post contains affiliate links.

5 from 6 votes
A pretty in pink dessert that is low carb and packed with protein – and it tastes fabulous too! Recipe is super versatile to accommodate the protein powder of your choice, flavor profile, and a variety of sprinkles on top – You do You! 125 cal each, 8g protein, 5g net carb and 6g fat! A no guilt treat for your gal-pal gathering – or an anytime protein snack.
Sugar-Free Strawberry Protein Cupcakes with White Ganache Icing
Cook Time
20 mins
Total Time
25 mins
 

A pretty in pink dessert that is low carb and packed withprotein – and it tastes fabulous too! Recipe is super versatile to accommodate theprotein powder of your choice, flavor profile, and a variety of sprinkles ontop – You do You!  125 cal each, 8g protein,5g net carb and 6g fat! A no guilt treat for your gal-pal gathering – or ananytime protein snack.

Course: Dessert, Snack
Keyword: cake, cupcake, protein powder, strawberry
Servings: 8 servings
Calories: 125 kcal
Ingredients
  • cup strawberry or vanilla protein powder I used Nuzest Plant-based
  • cup low-carb sweetener like erythritol or xylitol (or another approx. 1:1 cup sugar sub equlivalent)
  • ½ cup coconut flour
  • cup gluten-free baking blend flour
  • 2 tsp baking powder
  • 2 large eggs
  • 1 1/2 cups milk of choice
  • ¼ cup sugar-free white chocolate or vanilla baking chips
  • 3 tbsp heavy cream
  • optional 2 tbsp powdered dehydrated strawberries (if you want the icing to be pink)
Instructions
  1. Preheat oven to 350F.
  2. In medium bowl, toss together all dry ingredients including protein powder, sweetener, coconut flour, gluten-free flour, and baking powder.
  3. In glass liquid measuring cup, whisk two eggs into milk and pour over dry ingredients. Stir into combined well.
  4. Place a generous ¼ cup spoonful of batter into cooking vessel that has been coated with cooking spray or paper liners. This could be a silicone mold (doesn’t need spray), a standard muffin tin, a 5 to 6 ounce ramekin or even an 9” cake pan (cooking time will be a bit longer for cake).
  5. Bake for 20 to 25 minutes or until top lightly browning and toothpick inserted into center pulls clean (not gooey). For a 9” cake pan, ad 5 to 7 more minutes and test for doneness the same way.
  6. Remove from oven and let cool for 5 to 10 minutes. With a rolling pin, crush up dehydrated strawberries (if using them to make icing pink) in a small zip baggie.
  7. Make white ganache icing by adding white chocolate or vanilla baking chips and cream to small, microwave-safe bowl and microwaving in 20-30 second increments, stirring between each until smooth.
  8. Next, stir in crushed dehydrated strawberries (if using them) into vanilla ganache icing. Use a spoon to drizzle over each cupcake and use back of spoon to spread around. Sprinkle with more dehydrated strawberries or any other decorative topping of your choice.
Recipe Notes

Granola Chocolate Bark (Small Batch with Low Carb Options)

This easy-to-make chocolate nut butter candy will have your heart at first bite! It’s a small batch dessert recipe, but there is plenty to share with your sweetheart (or not)! And, only three ingredients! Visit the 15-sec video HERE!

Treat yourself (and a sweetheart) to this share-sized dessert that features only three ingredients (chocolate, nut butter, and granola)! Easy-peasy, the only ‘cooking’ is melting chocolate chips in the microwave! A fun Valentine’s Day treat, or for chocolate bark any day of the year! Low carb and sugar free options, very flexible.

Rich, creamy, and studded with your favorite granola (use plain packaged granola, a fancy granola with all the fixings, or your special homemade granola recipe).

Treat yourself (and a sweetheart) to this share-sized dessert that features only three ingredients (chocolate, nut butter, and granola)! Easy-peasy, the only ‘cooking’ is melting chocolate chips in the microwave! A fun Valentine’s Day treat, or for chocolate bark any day of the year! Low carb and sugar free options, very flexible.

Basically, a no-bake dessert (except melting chocolate chips in the microwave for about 1 minute), you’ll find this is a quick, easy, and uncomplicated way to soothe a chocolate-lover’s sweet tooth. Plus, you may already have all the ingredients in your pantry!

 This small-batch recipe is featured in my newest book, Cooking for One for Dummies (which can be pre-ordered NOW, and releases March 8, 2023).

In the cookbook, I show the Granola Chocolate Bar spread out thinly, using a silicone sheet or parchment-lined loaf pan or free-form on a lined cookie sheet.

Treat yourself (and a sweetheart) to this share-sized dessert that features only three ingredients (chocolate, nut butter, and granola)! Easy-peasy, the only ‘cooking’ is melting chocolate chips in the microwave! A Low carb and sugar free options, very flexible. Featured in Cooking for One for Dummies by Jennifer Fisher, thefitfork.com

Today, for a Valentine’s treat, I thought it would be cute to do in a heart-shaped ramekin! This creates a “thicker” result. If going this route, use an approximate 10-oz Crème Brulé-style ramekin or two smaller 6-oz low-side ramekins.  I’m kinda a ramekin collector freak, they are so fun and can be used for lots of smaller-scale recipes for one or two; using to hold prepped ingredients while making a recipe; for holding your everyday snacks for portion control.

Approximate macros for sugar-free chip version (will vary some based on nut butter and granola choices): 191 calories, 13g fat, 14g net carb, 3g protein

Treat yourself (and a sweetheart) to this share-sized dessert that features only three ingredients (chocolate, nut butter, and granola)! Easy-peasy, the only ‘cooking’ is melting chocolate chips in the microwave! A fun Valentine’s Day treat, or for chocolate bark any day of the year! Low carb and sugar free options, very flexible.
Pin this for later!

PRO TIPS FOR GRANOLA CHOCOLATE BARK

Tip 1: There is so much flexibility, you can mix and match ingredients to suit your dietary preferences (for example there are lots of swaps if looking for low carb dessert ideas):

  • Chocolate: I used sugar-free dark chocolate chips, but feel free to substitute traditional chocolate chips. Also, try milk chocolate, white chocolate, cinnamon chip and all the other flavors out there!
  • Nut Butter: The only real requirement is to use a natural-style nut butter and NOT the solid kind with hydrogenated fats and sugars.  I used a cinnamon-flavored almond butter in my recipe today, but peanut butter, walnut butter, cashew butter, protein-boosted nut butters and most all types of blends will work!
  • Granola: For convenience, use packaged granola from your favorite brand. Of course, homemade granola is excellent too! If you don’t want to use granola, swap in an equal portion of things like coconut shreds, toasted chopped nuts, dehydrated or freeze-dried fruit pieces, little candies of choice, etc.

Tip 2: For less mess making granola bark, it’s highly recommended to oil the ramekin or, if using a baking sheet, use parchment paper or a silicone matt. You can also make in silicone candy molds, but I haven’t personally experiment with that.

Tip 3: Don’t skip the sticking in freezer step to firm up the chocolate bark before eating. Store leftovers in fridge.

Disclaimer: This post contains affiliate links.

Granola Chocolate Bark (Small Batch with Low Carb Options)
Prep Time
5 mins
Total Time
35 mins
 

Treat yourself (and a sweetheart) to this share-sized dessert that features only three ingredients (chocolate, nut butter, and granola)! Easy-peasy, the only ‘cooking’ is melting chocolate chips in the microwave! A fun Valentine’s Day treat, or for chocolate bark any day of the year! Low carb and sugar free options, very flexible.

Course: Dessert, Snack
Keyword: candy, chocolate, holiday, low carb, valentines day
Servings: 4
Calories: 191 kcal
Ingredients
  • 1/3 cup chocolate chips sugar-free, if desired
  • ¼ cup natural-style nut butter peanut, almond, cashew, etc.
  • ½ cup of your favorite granola any type or your own toppings
Instructions
  1. In a small microwave-safe bowl, melt the chocolate chips on high in 30-second intervals, stirring between each, until the chocolate is melted and smooth.
  2. Stir in nut butter until smooth. Pour the chocolate mixture into a 10 to 12-ounce low ramekin*
  3. Sprinkle granola evenly over the top of the chocolate mixture and press down lightly so that it stays put. Freeze for 30 minutes to 1 hour, or until the bark has firmed up.
  4. Slice into pieces; store the leftovers in the refrigerator.
Recipe Notes

* Instead of a ramekin, spread chocolate mixture out thinly on a silicone mat (on baking sheet) before topping with granola. After freezing, break up into free-form pieces. You can also use silicone baking and candy molds for a different effect.

Approximate macros for sugar-free chip version (will vary some based on nut butter and granola choices): 191 calories, 13g fat, 14g net carb, 3g protein