Southwest Cottage Cheese Egg Salad: Protein-Packed!

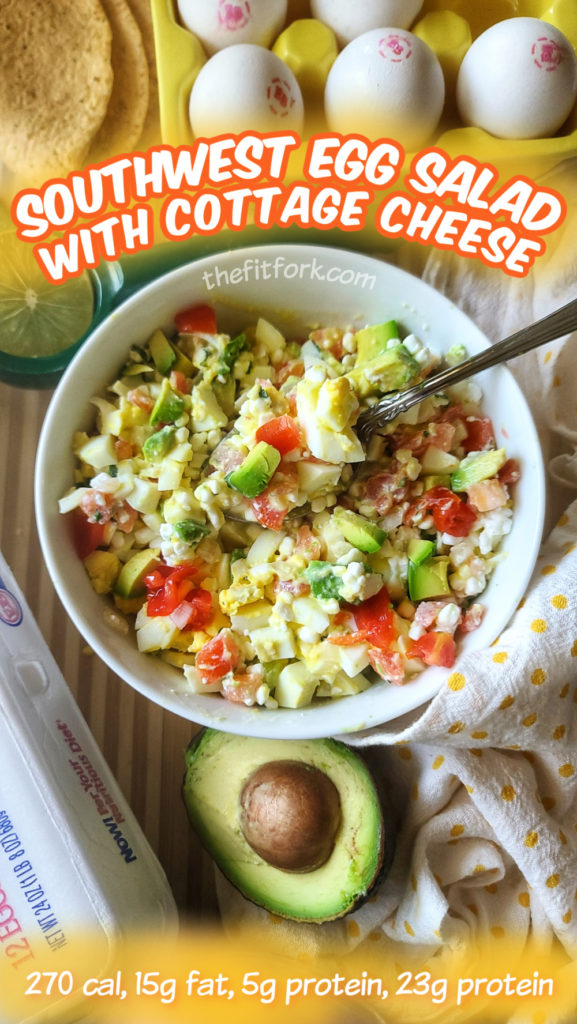
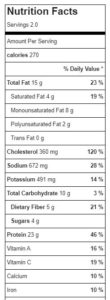
When life gets hectic and you’re wondering what to eat for lunch, it’s tempting to reach (or drive-thru) for something quick and not-so-healthy. But instead try my Southwest Cottage Cheese Egg Salad, a delicious, nutritious option that’s just as fast. This busy-day lunch idea is simple, economical, low-carb, and packed with protein to keep you fueled up to going. Macros: 270 cal, 15g fat, 5g net carb, 23g protein

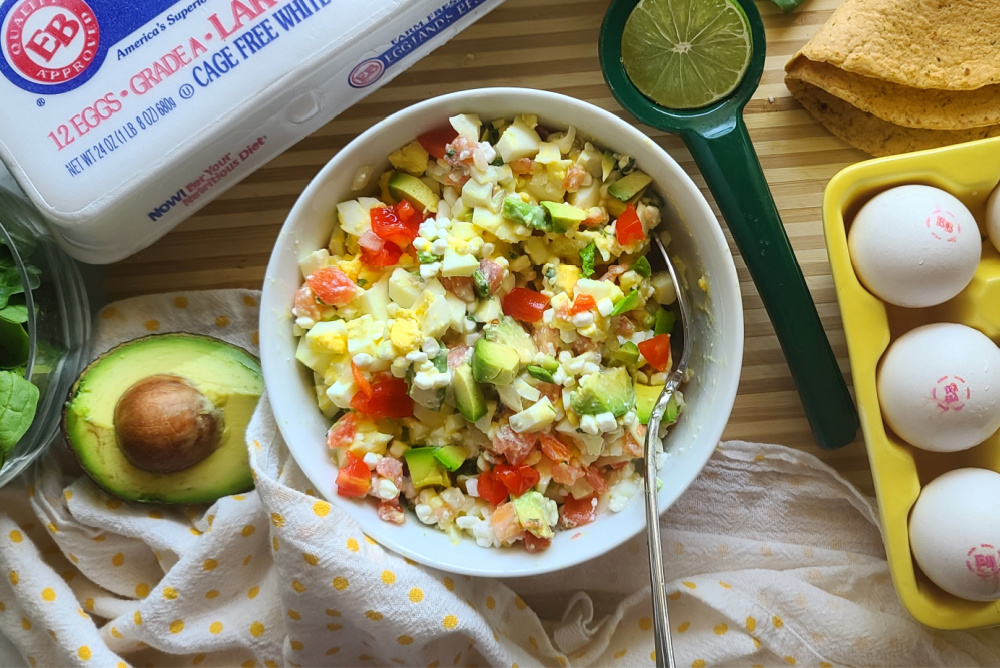
 The simple, wholesome ingredients include chopped eggs mixed with pico de gallo, cottage cheese, fresh lime juice (try this lime squeezer), and avocado. This combination makes for a satisfying, flavorful meal that you can enjoy in so many ways! Pile it into a low-carb wrap for a convenient handheld lunch or spread it on a slice of whole-grain bread. But, it’s not just for sandwich and wrap fillings — try tossing it over a fresh salad, stuffing it into a scooped-out tomato or cucumber, or even serving it as an appetizer with crackers.

One of the best parts of this egg salad variation is the use of low-fat cottage cheese instead of mayonnaise. Blending the cottage cheese until smooth gives you a creamy texture without the extra fat, while boosting the protein content. This swap makes the dish not only lighter but also more satisfying, perfect for those looking to stay full throughout the day.

This southwest egg salad is a true lifesaver when you’re on the go or need a quick meal idea. You may have tried other eggs salad recipes that have been mediocre – but this one is a winner! Give it a try, you’ll be amazed at how simple and flavorful healthy eating can be! In the video, I’m eating in one of my favorite ways – a low-carb tortilla wrap! BTW, love to store my boiled eggs in a cute ceramic egg holder so I don’t get them confused in the fridge with raw eggs!

Southwestern Cottage Cheese Egg Salad
Prep Time
5 mins
Cook Time
0 mins
Total Time
5 mins
 

Spice up lunch with these flavorful Southwest Cottage Cheese Egg Salad. Thanks to cottage cheese, it offers more protein with less fat than a traditional recipe. With a zesty lime kick and great nutrition, this quick meal – use in a tortilla wrap, fix up a sandwich, pile on a salad, or stuff into a scooped-out tomato or cucumber.

Course: entree salad, lunch
Cuisine: Southwestern
Keyword: avocado, cottage cheese, egg
Servings: 2 servings
Calories: 270 kcal
Ingredients
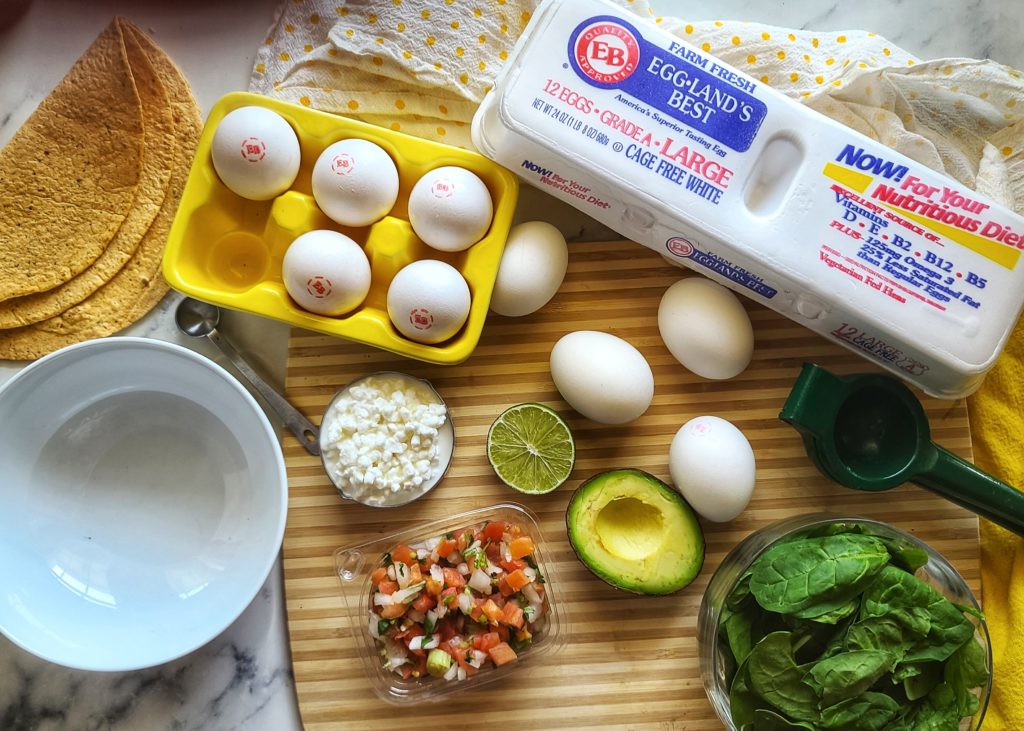
  • 4 large hard-boiled eggs peeled and roughly chopped
  • 4 ounces Pico de Gallo
  • 2/3 cup cottage cheese* *blended if you prefer a more creamy texture
  • ½ medium avocado chopped
  • 2 tsp lime juice
Instructions
  1. In medium bowl, mix together chopped eggs, cottage cheese, chopped avocado, pico de gallo and lime juice.

  2. Serve in wrap, sandwiched between bread, on a green salad or stuffed into a tomato — so many options!

Recipe Notes

Note: This post contains Amazon affiliate links.

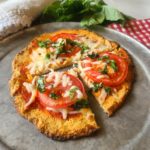
3-Ingredient Cottage Cheese Pizza Crust (Low Carb, Gluten Free, Protein)

Treat yourself to pizza night done right with 3-Ingredient Cottage Cheese Pizza Crust, a gluten-free, low-carb and protein-packed alternative to traditional crusts.

I’ve been baking and cooking with cottage cheese for YEARS, so it’s funny to see all these viral cottage cheese recipes on TikTok, Instagram and such as if it’s something new! Using cottage cheese is a smart way to bump up protein, lower fat, and minimize carbohydrates in many recipes – pizza crusts included!

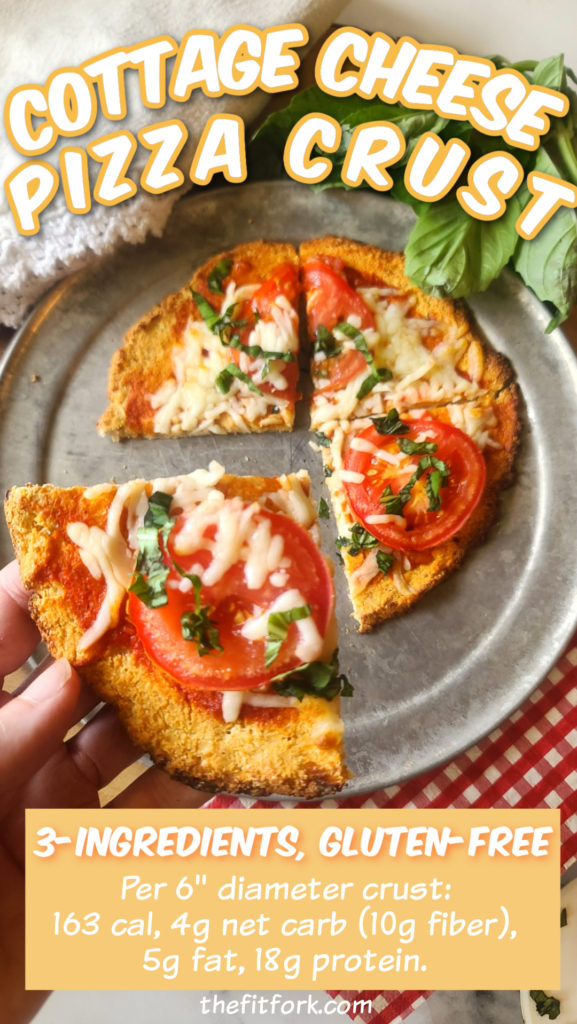
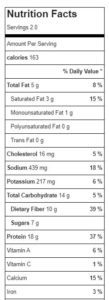
The macros on this pizza crust are impressively good. The recipe makes two personal sized crusts (about 6” diameter each) with a single crust (before toppings of your choice) coming in at 163 cal, 4g net carb, 10g dietary fiber, 5g fat and 18g protein.

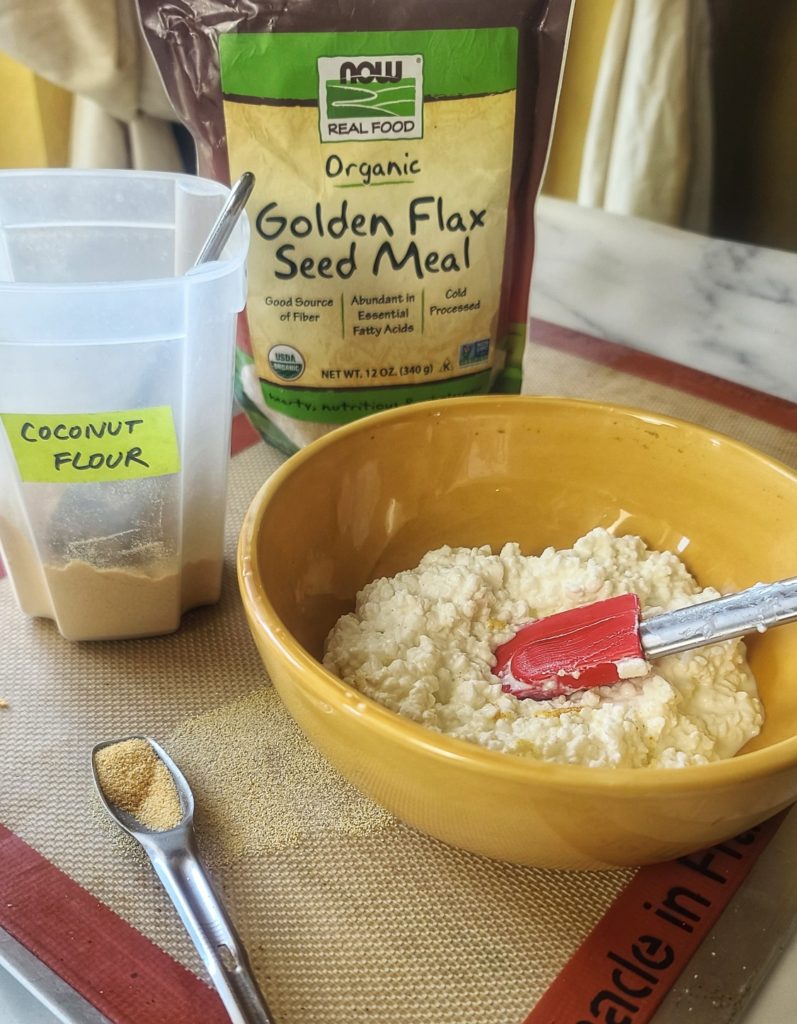
The only ingredients used in this low carb pizza crust are cottage cheese, coconut flour and ground flax seed meal.

TIPS FOR MAKING COTTAGE CHEESE PIZZA CRUST:

COTTAGE CHEESE: When it comes to selecting cottage cheese for his keto pizza crust recipes, pick a small curd cottage cheese with 2% or 4% milk fat. Stay away from the Fat-free cottage cheese, it does not perform as well. Also, if you use small-curb cottage cheese, there is no need to blend the cottage cheese smooth (as some similar recipes call for). For reference, I used Good Culture 2% Classic Low-Fat Cottage Cheese. They also make a lactose-free cottage cheese, if that is needed.

COCONUT FLOUR: This recipe only calls for ¼ cup of coconut flour, but it is a very “thirsty” flour and much less is required than other types of flour. For this reason, please to not make flour substitutes.

GROUND FLAXSEED MEAL: I added ground flax seed to add more fiber to the recipes, along with omega fatty acids. If you can not source this, you can *likely* just substitute with 1 tablespoon more of coconut flour – but I have not tried this yet, so let me know if you do.

OPTIONAL SEASONINGS: You won’t need salt because cottage cheese has enough sodium. But you might like to add garlic powder, everything bagel seasoning, fresh chopped herbs, or whatever else you would prefer.

BAKING: You will need parchment paper or a silicon baking sheet to cover your baking pan and prevent sticking.

COOLING & STORING: After removing the crust from the initial baking, you will want to let it cool almost completely. Otherwise, it will be too fragile to handle. This recipe makes two homemade personal-sized pizza crusts. If you are not using both, cover the leftover one and keep in the fridge to use later for up to 5 days.

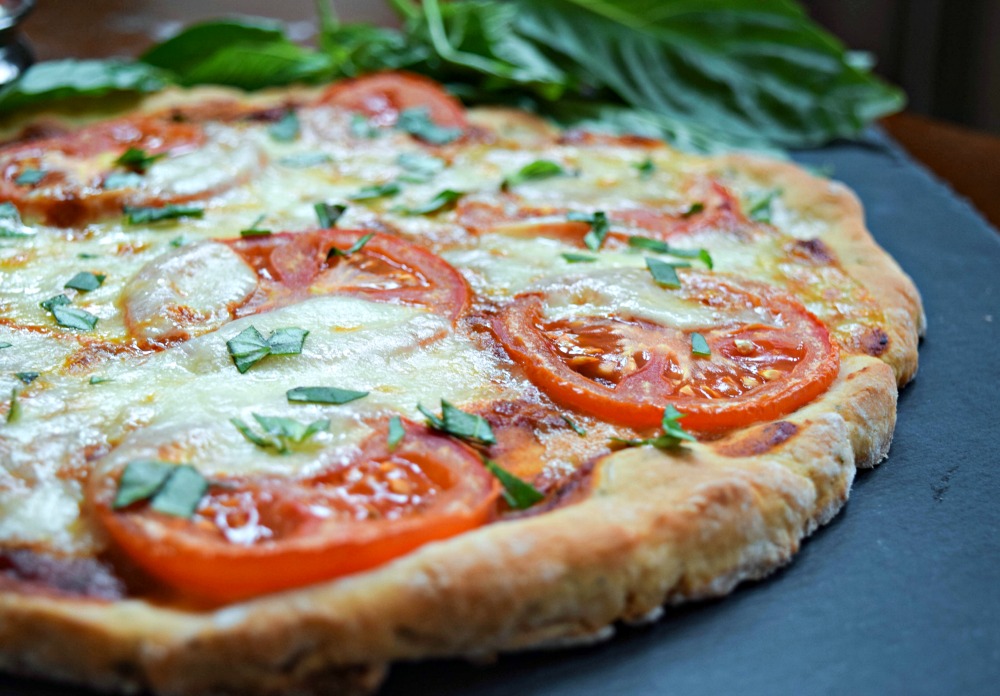
TOPPINGS: After your crust has mostly cooled, feel free to handle it to add sauce, more cheese, veggies, meats or whatever toppings you love. Pop back in the oven for about 10 minutes or until cooked to your preference.

Put your trust in this crust for pizza night! A low-carb, high-protein, gluten-free pizza crust that tastes amazing and holds up to the toppings of your choice. Recipe makes two personal-sized crusts, each with 163 cal, 14g carb (4 net carb), 5g fat and 18g protein.

I also have a 2-Ingredient, 2-Minut Pizza Crust recipe that the family loves too – it uses Greek Yogurt and self-rising flour (or an all-purpose gluten-free baking blend with a bit of baking soda).

2 Ingredient 2 Minute Pizza Dough
5 from 6 votes
Put your trust in this crust for pizza night! A low-carb, high-protein, gluten-free pizza crust that tastes amazing and holds up to the toppings of your choice. Recipe makes two personal-sized crusts, each with 163 cal, 14g carb (4 net carb), 5g fat and 18g protein.
3-Ingredient Cottage Cheese Pizza Crust
Prep Time
5 mins
Cook Time
20 mins
Total Time
35 mins
 
Simple, scrumptious and a crust you will crave for pizza night!! Add the toppings you enjoy. Makes two personal-sized crusts, each with 163 cal, 14g carb (4 net carb), 5g fat and 18g protein.
Course: Appetizer, dinner, lunch
Keyword: cottage cheese, gluten free, high protein, low carb, pizza
Servings: 2 servings
Calories: 163 kcal
Ingredients
  • 1 cup 2% or 4% cottage cheese Not zero-fat
  • ¼ cup coconut flour
  • 1 tbsp ground flax seed*
  • Optional: ½ tsp garlic salt or other seasoning of your choice However, don't add seasonings with a lot of salt added. Cottage cheese already has enough sodium.
Instructions
  1. Preheat oven to 400F.

  2. Add ingredients to bowl, mix until combined. Form into two balls.

  3. Line baking sheet with parchment paper or a silicone baking sheet. Use hands to smoosh down and form into two thin discs, approx. 6” diameter.

  4. Bake for approx. 20 minutes, or until turned golden brown and edges just about to get too brown. Remove from oven and let cool on pan about 5-10 minutes.

  5. Top with ingredients of choice and return to oven to bake for 10 more minutes, or until toppings done to your liking.

  6. If you don’t use the 2nd crust, wrap up and store in fridge for use later, up to 5 days.

  7. *If you can’t find this flax meal, try subbing in with 1 tbsp. more coconut flour. I can’t 100% vouch for outcome, but it should work. The flax is just a nice variety, offers fiber and omega fatty acids.

Recipe Notes

Cottage Cheese Pizza Crust nutrition

Note: This post contains Amazon affiliate links.

Low-Carb Yogurt Gelatin Cup Refuels with Protein & Electrolytes

Get refreshed, refueled and revitalized with this fun, wiggly, jiggly post-workout snack – a Creamy Gelatin Protein Cup easily crafted with a blend of sports protein water and luscious Greek yogurt.

I used PWR LIFT protein water and Zero-Sugar Chobani (no-fat), both in berry flavors, to create this dessert that’s like a low-carb Jello cup. The only other ingredient you need is unflavored gelatin. There are also a few vegan gelatin options.

Also, FYI, you can use a Greek Yogurt with higher or full milk fat for an even more luscious result (it will change the nutrition facts though). The fun thing about this yogurt Jello cup makeover recipe, and what keeps it from getting boring on repeat, is that you can use can get creative with the flavors by mix and matching the protein water and yogurt flavors!

Designed to replenish electrolytes, essential BCAAs (branched-chain amino acids), and protein after an intense workout or run, I like to say this satisfying healthy snack is like a sports drink you can eat, lol!

With just 67 calories per generous serving (about 10-oz), boasting a mere 3 grams of carbs and a whopping 14 grams of protein, it’s a low-carb, low-calorie delight that isn’t just for sweaty runners – it can help fill you up — and with lots of satiating protein –if you are on a weight loss journey and are looking for low carb desserts or keto desserts,

Refuel and replenish protein, electrolytes and bcaas after a hard workout with a yummy creamy jello like treat made with only 3 ingredients – a protein sports water, Greek yogurt, and unflavored gelatin. Low carb and low carb, also a smart idea for a satisfying dessert for diets or situations when you are avoiding sugar. 67 cal, 3g carb, 0 fat, 14g

Note: This post contains Amazon affiliate links.

4.8 from 5 votes
Refuel and replenish protein, electrolytes and bcaas after a hard workout with a yummy creamy jello like treat made with only 3 ingredients – a protein sports water, Greek yogurt, and unflavored gelatin. Low carb and low carb, also a smart idea for a satisfying dessert for diets or situations when you are avoiding sugar. 67 cal, 3g carb, 0 fat, 14g
Greek Yogurt Gelatin Protein Cup
Prep Time
5 mins
chilling
4 mins
Total Time
4 hrs 5 mins
 
Refuel and replenish protein, electrolytes and bcaas after a hard workout with a yummy creamy jello like treat made with only 3 ingredients – a protein sports water, Greek yogurt, and unflavored gelatin. Low carb and low carb, also a smart idea for a satisfying dessert for diets or situations when you are avoiding sugar. 67 cal, 3g carb, 0 fat, 14g protein.
Course: Dessert, Snack, workout
Cuisine: keto, low carb
Keyword: frozen yogurt, high protein, jello, keto
Servings: 2 servings
Ingredients
  • ¼ cup cool water
  • 1 packet unflavored gelatin about 1 tbsp
  • 1 16.9 oz bottle PWR Lift, flavor of choice
  • 1 5.3 oz carton Greek yogurt, any flavor or milk-fat using unflavored, (if using unsweetened yogurt, I’d add 5-10 drops of liquid stevia or monk fruit)
  • Optional: whipped cream, berries, etc for topping
Instructions
  1. Pour cool water into a microwave-safe bowl and sprinkle gelatin over water (don’t dump in one big clump, SPRINKLE!). Let sit for 5 minutes to “bloom” – it will look like runny applesauce.
  2. Microwave bloomed gelatin for JUST five seconds to liquify. If it doesn’t look clear and liquid-y, microwave another 3-5 seconds. Do NOT over microwave or the gelatin won’t work.
  3. Pour a room temperature PWR Lift and yogurt into bowl with gelatin, whisk to combine. Pour equally between two 12-oz bowls or glasses.

  4. Chill for 4 hours or until firm. If desired, top with more yogurt, whipped cream, berries, other toppings.

Recipe Notes

*Nutrition Facts: per 10-oz serving

67 cal, 3g total carb, 0g fat, 14g protein

*nutrition facts will vary based on milk fat and sugars in yogurt and the brand of protein water.

Fire Up Fall: Grilled Steaks with Autumn Spice Rub

Grilled Steaks with Autumn Spice Rub . . . the most lit season of the year is here, and I’ve fired up my grill for it!

Thanks to this easy steak rub recipe featuring the flavors of fall, along with a tender cut of beef, you can make an amazing meal in just about 15 minutes – perfect for busy weeknights, yet will so impressive for guests!

The autumn steak rub is so easy, and each batch makes enough for about one pound of beef. So, if you are making more, just double or triple it. It should last for the season in an air-tight container, like a small spice bottle or canning jar.

The autumn spices for beef include ancho chile pepper, ground cinnamon, allspice and salt. Brown sugar also adds a nice balance to the warming and slightly spicy flavor, addling just a hint of sweetness. Instead of brown sugar, you can swap in coconut sugar or date sugar.

The autumn spices of these easy steak fall steak rub are a perfect pairing with some favorite side dishes of the season like sweet potatoes, pumpkin risotto, butternut squash and more.

How to use Autumn Spice Rub for Steak

Steak Choice: Pick a cut of beef that is tender, like tenderloin steaks (what I used today), strip steaks, ribeye, flat iron, or top sirloin steaks.  Don’t use beef cuts like flank steak, skirt steak, chuck shoulder steaks and round steaks as they are not inherently as tender and need to be marinating for a couple hours for the best eating experience.

Other Proteins: This fall-inspired spice rub would also be great on lamb, chicken, pork and heartier seafoods, like halibut filets.

Applying the Rub: As mentioned, this recipe covers about one pound of steaks – it’s intended to be applied generously. It’s easy to double or half if you need more or less. Whether you apply oil to your steak before the rub is personal preference, in my opinion. Some say it helps the spices adhere to the meat better and keeps the meat from sticking to the grill. If you use an oil, make sure to pick one with a high smoke point – like grapeseed oil, avocado oil, or olive oil (but not EVOO). When oils are taken over their smoking point, they start to burn and leave a bitter taste on the meat. Yucko.

Basic Tips on Grilling Steak: 1) clean your grill grates; 2) oil your grill grates; 3) grill at 400F degrees avoiding flare ups; 4) resist urge to flip continuously – just once will do it; 5) for the perfect medium-rare, pull off with internal temp reaches 130F – let rest for 5 minutes or so on platter until temp has risen to 135F; 6) Exact grilling times listed in various recipes will vary on your grill temperature, the thickness of your cut, the crowding of your grill, etc.

This easy steak rub recipe is bursting with the flavors of fall and adds a seasonal sizzle to tender cuts of steak like tenderloin, flat iron, strip, ribeye and more.
5 from 6 votes
This easy steak rub recipe is bursting with the flavors of fall and adds a seasonal sizzle to tender cuts of steak like tenderloin, flat iron, strip, ribeye and more.
Grilled Steaks with Autumn Spice Rub
Prep Time
5 mins
Cook Time
12 mins
rest
5 mins
 

This easy steak rub recipe is bursting with the flavors of fall and adds a seasonal sizzle to tender cuts of steak like tenderloin, flat iron, strip, ribeye and more.

Course: dinner, dinner, entree
Cuisine: grill
Keyword: autumn, fall, grilling, spices, steak
Ingredients
  • 1 tbsp brown sugar or coconut sugar or date sugar
  • 1 tbsp ground ancho chili pepper
  • ½ tbsp ground cinnamon
  • 1 tsp allspice
  • 1 teaspoon sea salt
Instructions
  1. Add all spices to a small jar and shake up until combined.
  2. Apply to steaks (oiled or un-oiled) generously on front, back and sides.
  3. Cook steak on pre-heated 400F degree grill, to just a few degrees under your desired level of “doneness”.
  4. Transfer to platter and let rest 5-10 minutes before cutting.

Sugar-free “Like Magic” Shell Dessert Topping for Healthy Sweets

If you were a kid in the 80s and 90s, you surely remember “Magic Shell”, a popular dessert topping known for its ability to harden quickly when poured onto cold surfaces. In fact, Magic Shell can still be purchased in-store and online today.

Drizzle, dunk or dip! This Sugar-free “Like Magic” Shell Dessert Topping with have you fondly reminiscing about being a kid! A simple, two-ingredient chocolate sauce recipe with unlimited uses for your dessert creations.

However, as a now grown-up girl-at-heart, who likes to manage both her carb count and pocketbook, I like to make my own no-sugar like magic shell chocolate sauce using just two ingredients – sugar free chocolate chips and coconut oil!  THAT’S IT!

Drizzle, dunk or dip! This Sugar-free “Like Magic” Shell Dessert Topping with have you fondly reminiscing about being a kid! A simple, two-ingredient chocolate sauce recipe with unlimited uses for your dessert creations.

To make a generous, 2-serving batch just add 1-ounce sugar free chocolate chips (about 3 tbsp) to a small microwave-safe bowl and add 1 teaspoon of coconut oil – it’s fine if still in solid form, it all melts together! Next, microwave for about 35-45 seconds until melting, then stir together until glossy and smooth. If you want a bigger batch, simply use the same 1 oz chocolate to 1 tsp coconut oil ratio – you may need to microwave a little longer to accommodate the larger volume.

.So, now that the chocolate sauce that hardens is done, it will work its “magic” by solidifying on contact with cold items – the coconut oil helps make it easy to drizzle, but then reverts back to its solid state after cooling! You can speed up the hardening process further by sticking your drizzled, dunked and dipped items into the fridge for a minute or two afterward.

FUN WAYS TO USE SUGAR-FREE “LIKE MAGIC” SHELL TOPPING 

Frozen Treats: Pour over ice cream and frozen yogurt. Even dunk popsicles into it!

Cold Desserts: Yogurt parfaits, trifles, frozen pies, cheesecakes and more.

Drink Rims: Add to the rim of a cold cocktail glass before filling – what a fun and delicious surprise!

Decorative Designs: Write a name or “draw” a design on a chilled plate or serving dish before placing ice cream or desserts on them.

Dipped & Drizzled Treats: Dip cookies, pretzels, marshmallows, or other snacks into hardening chocolate sauce quick chocolate coating. Try drizzling on popcorn that’s cooled and then tossing on coarse sea salt – -so good!

Fruit: Dip fresh fruits like strawberries, bananas, and apple slices into the sugar-free chocolate topping or drizzle across a bowl or tray full of fruit.

Drizzle, dunk or dip! This Sugar-free “Like Magic” Shell Dessert Topping with have you fondly reminiscing about being a kid! A simple, two-ingredient chocolate sauce recipe with unlimited uses for your dessert creations.

 TIPS FOR MAKING & STORING SUGAR-FREE HARDENING CHOCOLATE SAUCE

No water. Don’t add any water to this recipe to thin it out — that’s going to mess it up. In fact, ensure that the bowl you are using to melt chocolate chips in is completely dry and free of moisture.

Choosing Chocolate Chips: You can use any chocolate chip that works for your dietary eating pattern – sugar-free or dairy-free or traditional style made with sugar. You can also choose another flavor of chip such as white chocolate, butterscotch, peanut butter, and such.

Oil Substitutions: NO! Do not substitute coconut oil for another oil – it will not harden back up in the same way and sauce will remain runny.  Also, do NOT use coconut oil that has been “fractionated”, a processing step that keeps it in a liquid state at room temperature. Only use regular coconut oil that will appear solid at room temperature (under 78 degrees). 

Application: Simply spoon the sugar-free magic shell onto its final destination or use a small drizzle bottle. I personally like to use a mini mason jar (2-oz), because I can also use that jar to melt the chocolate – so less mess!

Storage: Do not store leftovers in the fridge. Instead, cover tightly and keep on counter or pantry, until needed – it really doesn’t go bad (or, I’ve always gobbled mine up before it has – I’m sure it would take months). If it’s a colder day, you may need to pop it in the microwave for 5-10 seconds to make more pourable.

I like to use this sugar-free magic shell sauce on my protein cheesecakes, it adds a lot of fun, flavor and flair — and I don’t have to worry about excess sugar.

Get the recipe for Boston Cream Pie Protein Cheesecake.

Note: This post contains affiliate links and I may earn a small commission on purchases — which I use to offset operating expense for The Fit Fork. Thank you!

Drizzle, dunk or dip! This Sugar-free “Like Magic” Shell Dessert Topping with have you fondly reminiscing about being a kid! A simple, two-ingredient chocolate sauce recipe with unlimited uses for your low carb dessert creations.